🪟 Windows
The OpenUEM server components can be installed on a Windows machine using an installer.
OpenUEM server has been tested successfully on Microsoft Windows 10, Microsoft Windows 11 and Microsoft Windows Server 2025
1. Download the installer
Visit the Downloads section and choose the download link for the server version
Download your preferred version and note that you can check if the checksum matches using Powershell's Get-FileHash:
Get-FileHash openuem-server-setup-0.12.0.exe

Algorithm       Hash                                                                   Path
---------       ----                                                                   ----
SHA256          18587C61437F3A3679AA1BBC14C1CE74986CCBCB36B003B78A12F2DBB831E27F       C:\Users\doncicuto\Downloads\openuem....
2. Install OpenUEM server
2.1 Silent installation
OpenUEM server can be installed silently.
Here's an example to install all the components in the same server:
openuem-server-setup-0.9.0.exe /console=yes /ocsp=yes /nats=yes /agent-worker=yes /notification-worker=yes /cert-manager-worker=yes /dbhost=localhost /dbport=5432 /dbuser=test /dbpassword=test /dbname=openuem /domain=local.openuem.eu /gencerts=yes /orgname=OpenUEM /orgcountry=ES /orgprovince=Valladolid /orglocality=Valladolid /natsserver=lothlorien.local.openuem.eu /natsport=4433 /natscluster=no /ocspserver=lothlorien.local.openuem.eu /ocspport=8000 /consoleserver=lothlorien.local.openuem.eu /consoleport=1323 /authport=1324 /jwtkey=alongsecretkey /VERYSILENT
If you instruct the installer to generate certificates, these cryptographic operations will require some time so, please, be patient
You can run the OpenUEM server installer by using the following flags:
| Flag | Description | Example |
|---|---|---|
| /console= | Install the console component (yes or no) | yes |
| /ocsp= | Install the OCSP Responder component (yes or no) | yes |
| /nats= | Install the NATS server component (yes or no) | yes |
| /agent-worker= | Install the Agents worker component (yes or no) | yes |
| /notification-worker= | Install the Notification worker component (yes or no) | yes |
| /cert-manager-worker= | Install the Cert Manager worker component (yes or no) | yes |
| /dbhost= | The name of the host serving the Postgres database | localhost |
| /dbport= | The port used by the Postgres server | 5432 |
| /dbuser= | The username to connect to the Postgres server | test |
| /dbpassword= | The password to connect to the Postgres server | test |
| /dbname= | The database name | openuem |
| /domain= | The domain used in your organization to resolve agent/endpoint names to IP address | openuem.eu |
| /gencerts= | Let OpenUEM create a CA and generate the required certificates by OpenUEM (yes or no) | yes |
| /reverseproxydomain= | If you want to use OpenUEM behind a reverse proxy and certificates are going to be generated, set the DNS name that you want to use to access OpenUEM console. Don't use the flag if no reverse proxy is going to be used or gencerts has been set to no | console.openuem.eu |
| /orgname= | Your organization's name | OpenUEM |
| /orgcountry= | The country where your organization is located (two-letter code) | ES |
| /orgprovince= | The province where your organization is located (optional) | Valladolid |
| /orglocality= | The locality where your organization is located (optional) | Valladolid |
| /orgaddress= | The address where your organization is located (optional) | My address |
| /natsserver= | The domain name used by the NATS server | nats.example.com |
| /natsport= | The port used by the NATS server | 4433 |
| /natscluster= | Are you using a NATS cluster? (yes or no) | no |
| /natsclustername= | The name for the NATS Cluster | openuem-cluster |
| /natsclusterport= | The port used by this NATS server to serve the cluster service | 4444 |
| /natsotherservers= | The comma-separated list of other NATS servers in the cluster | server2.example.com:4444,server3.example.com:4444 |
| /natsurl= | If the NATS component is not to be installed, insert the URLs of the NATS server (format: nats.example.com:4433). If you have more than one NATS server use a comma to separate them. Use the ports associated to the servers not the cluster ports | server1.example.com:4433,server2.example.com:4433,server3.example.com:4433 |
| /ocspserver= | The domain name used by the OCSP Responder | ocsp.example.com |
| /ocspport= | The port used by the OCSP Responder | 8000 |
| /consoleserver= | The domain name used by the console server component | server1.example.com |
| /consoleport= | The port used by the console server | 1323 |
| /authport= | The authentication port used by the console server | 1324 |
| /reverseproxyserver= | The domain name used by the reverse proxy service for the console (don't use this flag if no reverse proxy is used) | console.example.com |
| /reverseproxyauthport= | The port used by the reverse proxy authentication service for the console (don't use this flag if no reverse proxy is used) | 1345 |
| /jwtkey= | The JWT key used to encrypt tokens. Use a complex string (32 characters max length) | averylongcomplexsecret |
| /admincertpass= | If certificates are going to be generated you can set a password to protect the admin certificate (don't use if you want to use the default passsword which is changeit) | apassword |
| /cacert= | The location of the CA certificate if certificates are not automatically generated. See the note below this table | C:\tmp\ca.cer |
| /cakey= | The location of the CA private key if certificates are not automatically generated. See the note below this table | C:\tmp\ca.key |
| /natscert= | The location of the NATS server certificate if certificates are not automatically generated. See the note below this table | C:\tmp\nats.cer |
| /natskey= | The location of the NATS server private key if certificates are not automatically generated. See the note below this table | C:\tmp\nats.key |
| /ocspcert= | The location of the OCSP responder certificate if certificates are not automatically generated. See the note below this table | C:\tmp\ocsp.cer |
| /ocspkey= | The location of the OCSP responder private key if certificates are not automatically generated. See the note below this table | C:\tmp\ocsp.key |
| /agentworkercert= | The location of the Agent worker certificate if certificates are not automatically generated. See the note below this table | C:\tmp\agent-worker.cer |
| /agentworkerkey= | The location of the Agent worker private key if certificates are not automatically generated. See the note below this table | C:\tmp\agent-worker.key |
| /notificationworkercert= | The location of the Notification worker certificate if certificates are not automatically generated. See the note below this table | C:\tmp\notification-worker.cer |
| /notificationworkerkey= | The location of the Notification worker private key if certificates are not automatically generated. See the note below this table | C:\tmp\notification-worker.key |
| /certmanagerworkercert= | The location of the Cert-Manager worker certificate if certificates are not automatically generated. See the note below this table | C:\tmp\cert-manager-worker.cer |
| /certmanagerworkerkey= | The location of the Cert-Manager worker private key if certificates are not automatically generated. See the note below this table | C:\tmp\cert-manager-worker.key |
| /consolecert= | The location of the console certificate if certificates are not automatically generated. See the note below this table | C:\tmp\console.cer |
| /consolekey= | The location of the console private key if certificates are not automatically generated. See the note below this table | C:\tmp\console.key |
| /sftpkey= | The location of the SFTP private key if certificates are not automatically generated. See the note below this table | C:\tmp\sftp.key |
| /updatercert= | The location of the server updater certificate if certificates are not automatically generated. See the note below this table | C:\tmp\updater.cer |
| /updaterkey= | The location of the server updater private key if certificates are not automatically generated. See the note below this table | C:\tmp\updater.key |
If you are not generating the certificates automatically and you want to skip the flags to specify the paths to the different files, you can put the required certificates for the components to be installed in a certificates folder next to the installer. Here's the list of default paths:
| Component | Default expected path |
|---|---|
| NATS server | certificates\ca\ca.cer, certificates\nats\nats.cer, certificates\nats\nats.key |
| OCSP Responder | certificates\ca\ca.cer, certificates\ocsp\ocsp.cer, certificates\ocsp\ocsp.key |
| Console | certificates\ca\ca.cer, certificates\console\console.cer, certificates\console\console.key, certificates\console\sftp.key |
| Agent Worker | certificates\ca\ca.cer, certificates\agents-worker\worker.cer, certificates\agents-worker\worker.key |
| Notification Worker | certificates\ca\ca.cer, certificates\notification-worker\worker.cer, certificates\notification-worker\worker.key |
| Cert-Manager Worker | certificates\ca\ca.cer, certificates\ca\ca.key, certificates\cert-manager-worker\worker.cer, certificates\cert-manager-worker\worker.key |
| Update | certificates\ca\ca.cer, certificates\updater\updater.cer, certificates\updater\updater.key |
2.2 Wizard installation
If you install the server using the wizard you must introduce some information about the OpenUEM server components to be installed.
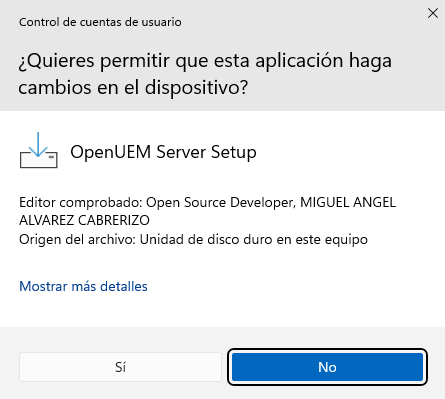
The agent windows installer is digitally signed. Microsoft Windows will show you the following information about the installer.
Once the installer starts you must select the language (English or Spanish).

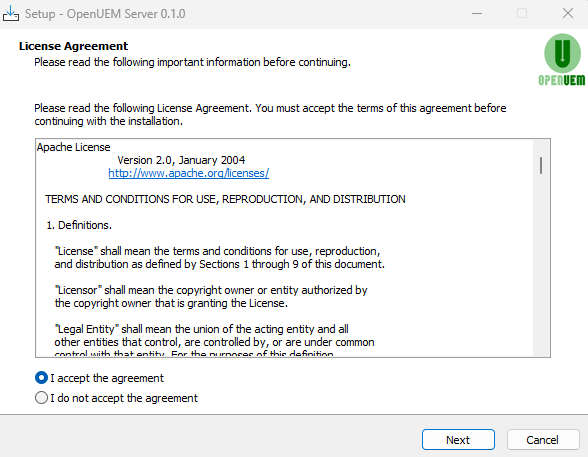
Then you must accept the Apache 2.0 Open-Source license clicking on "I accept the agreement".
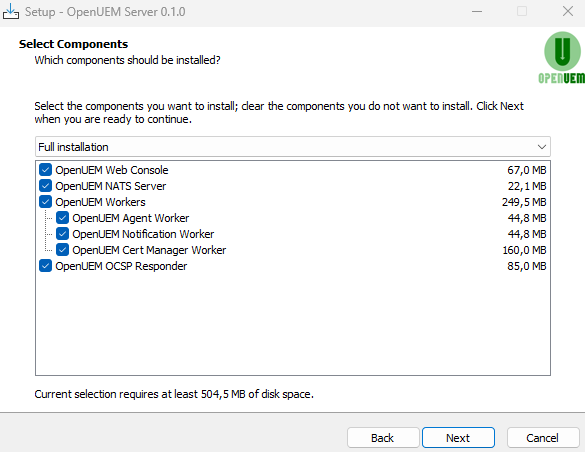
You must select which OpenUEM server component do you want to install.
In this page we’re assuming that you’re installing all the components in the same machine but remember that you can distribute the components in different machines.
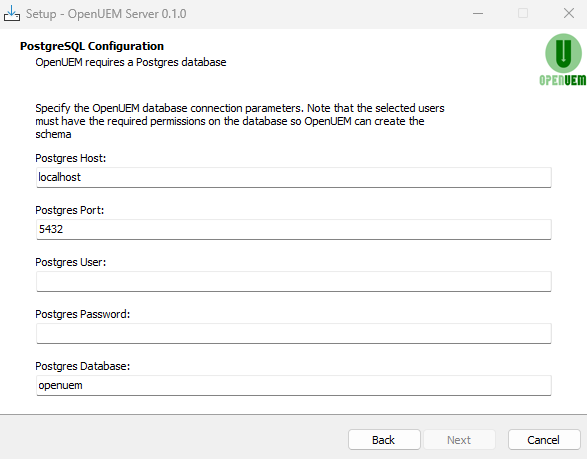
Now, specify the OpenUEM database connection parameters (host, port, user, password and database name).
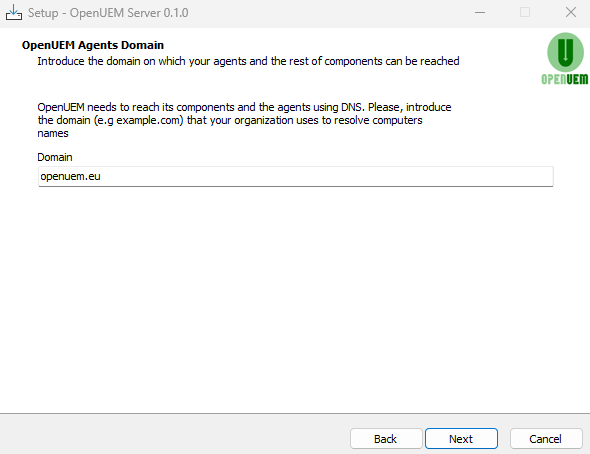
OpenUEM needs a DNS domain for your organization to resolve agent/endpoint names to IP address. Set the domain name to be used.
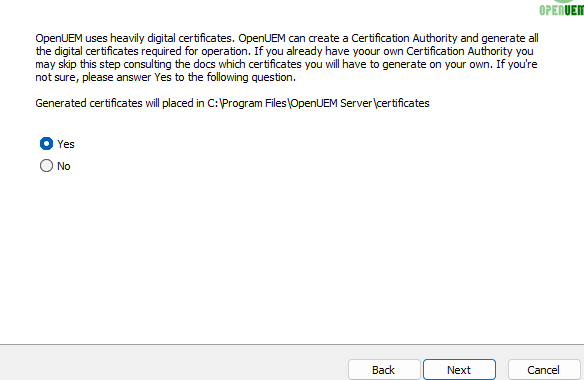
OpenUEM uses digital certificates to establish secure communication and TLS certificates. Unless you're using your own Certificate Authority, answer yes to this question so OpenUEM creates a Certificate Authority and the required certificates.
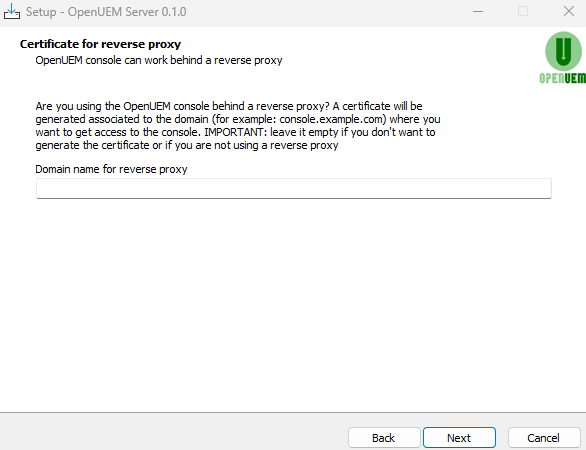
If you want to use OpenUEM behind a reverse proxy, set the DNS name that you want to use to access OpenUEM console
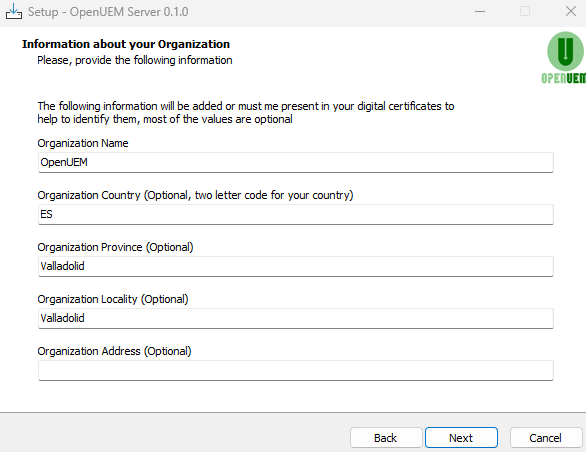
Now, you'll have to answer a few questions about your organization. These answers are only used to set values that identify your digital certificates and authenticate your NATS server connection.
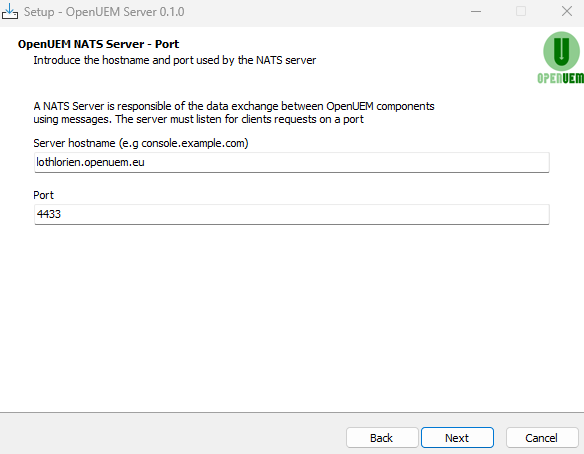
It’s time to specify which port and server name will be used by the NATS server:
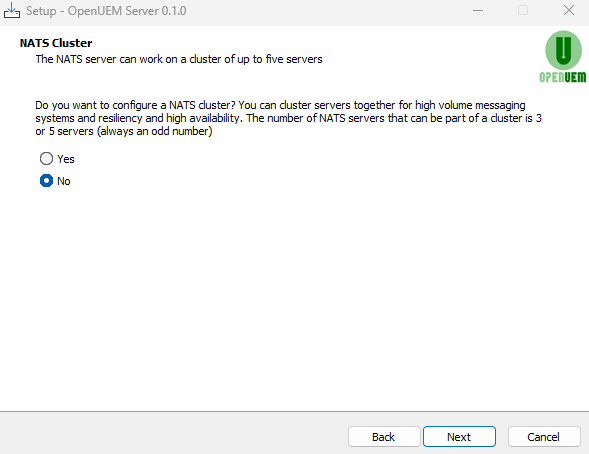
If you want to use a NATS cluster, answer Yes to the question. If it's the first time you install OpenUEM or you're not using hundreds of agents, it's better to answer No.
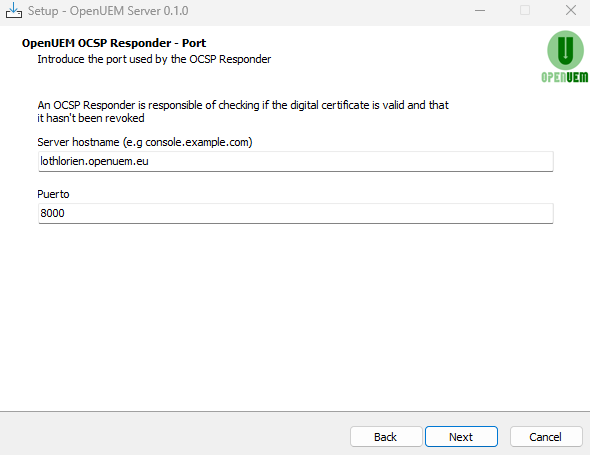
Introduce the server name and the port used by the OCSP Responder
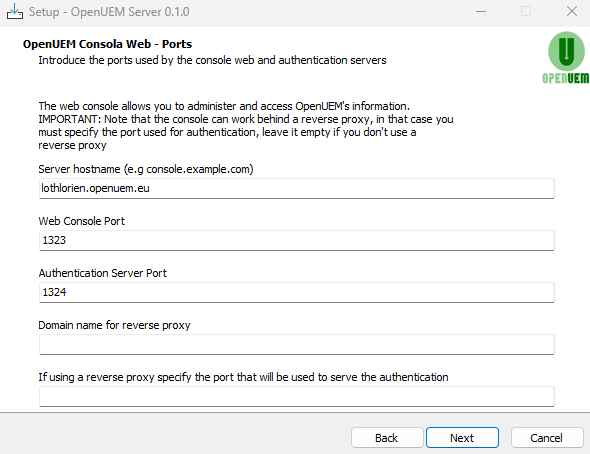
You'll have to specify the DNS domain name used by the server that hosts the console service, and the ports used by the web server and the authentication server. Also, if you want to use OpenUEM behind a reverse proxy you must specify the domain name associated with the reverse proxy service and the port that will be configured in the reverse proxy to serve authentication requests.
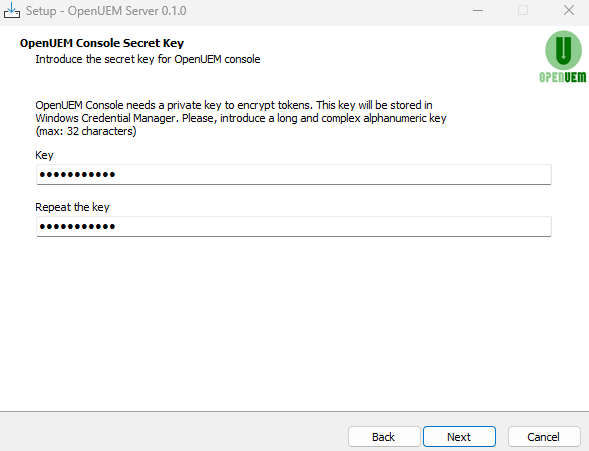
The console uses a key to encrypt tokens, please set a complex key and confirm it.
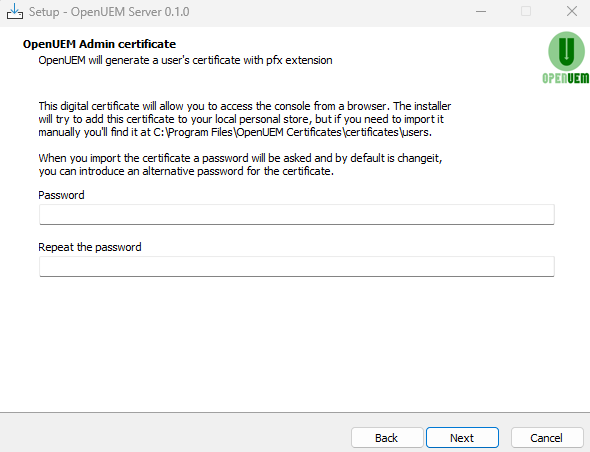
If OpenUEM has been selected to generate certificates automatically you've the chance to specify the password that protects the admin user certificate.
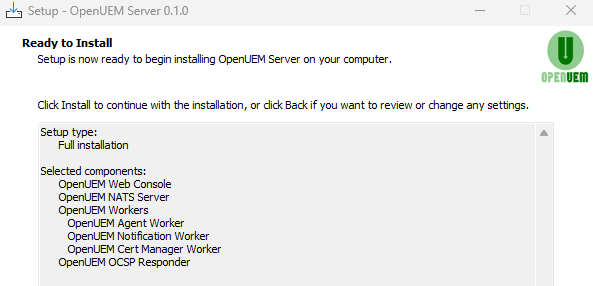
Once, all the questions are answered the package will be installed.
Installation may take some minutes if it must generate certificates so if you see that progress stalls for some minutes, please be patient as cryptographic operations are heavy, database schema is created, and hundreds of megabytes are copied.
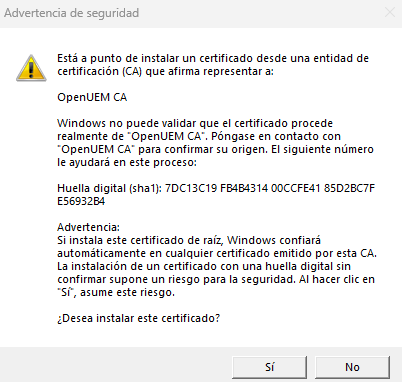
The installer will try to add the Certificate Authority certificate to the trusted root certificate authority’s store. You’ll receive a warning to confirm that you want to add the certificate.
3. Next steps and troubleshooting
After the installation finishes, you'll see the following message:
It's time to visit the OpenUEM console in your browser.
Now open https://SERVER_NAME:CONSOLE_PORT (replace the values that you've set during the package configuration) and you should see OpenUEM's console

Finally, log in to the console
3.1 Services
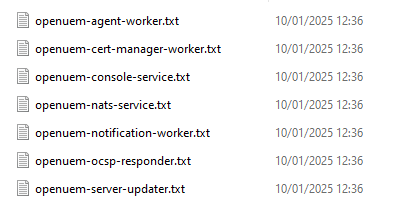
OpenUEM will install and enable the following services on your server:
- openuem-agent-worker, see Workers for more information
- openuem-cert-manager-worker, see Workers for more information
- openuem-console, see Console for more information
- openuem-nats-service, see NATS for more information
- openuem-notification-worker, see Workers for more information
- openuem-ocsp-responder, see OCSP Responder for more information
- openuem-server-updater, that is responsible for updating the server components from the console

All OpenUEM services will be run under the NetworkService account to mitigate risks.
The only exception is the openuem-updater-service that requires higher privileges under the LocalSystem account to reinstall OpenUEM components when the update action is performed from the console.
3.2 Configuration
OpenUEM config file is located at C:\Program Files\OpenUEM Server\config\openuem.ini. If you failed to provide the right answers while installing openuem-server you can edit this file to fix some settings.
This configuration file contains all the required information but the database password and JWT secret. Those credentials are stored using the Windows Credential Manager.
3.3 Certificates
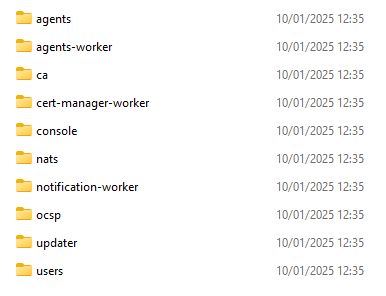
Unless you refused during the package configuration OpenUEM should have generated digital certificates. Those certificates should be located at C:\Program Files\OpenUEM Server\certificates.
There’s a folder for every required certificate type or, more specifically, for every component type.
Just in case, you’ll find the administrator certificate in the users folder.
3.4 Logs
OpenUEM logs are stored in C:\Program Files\OpenUEM Server\logs and you’ll find a log for every OpenUEM component that has been installed on that server.
3.5 Reinstalling OpenUEM
If you need to reinstall OpenUEM please proceed like this:
- Drop OpenUEM database tables so the new installation can perform a clean installation of the schema. If you prefer to keep the database, at least remove the user’s table as OpenUEM creates an entry for the admin user’s certificate and that entry must be unique.