🛂 Authentication
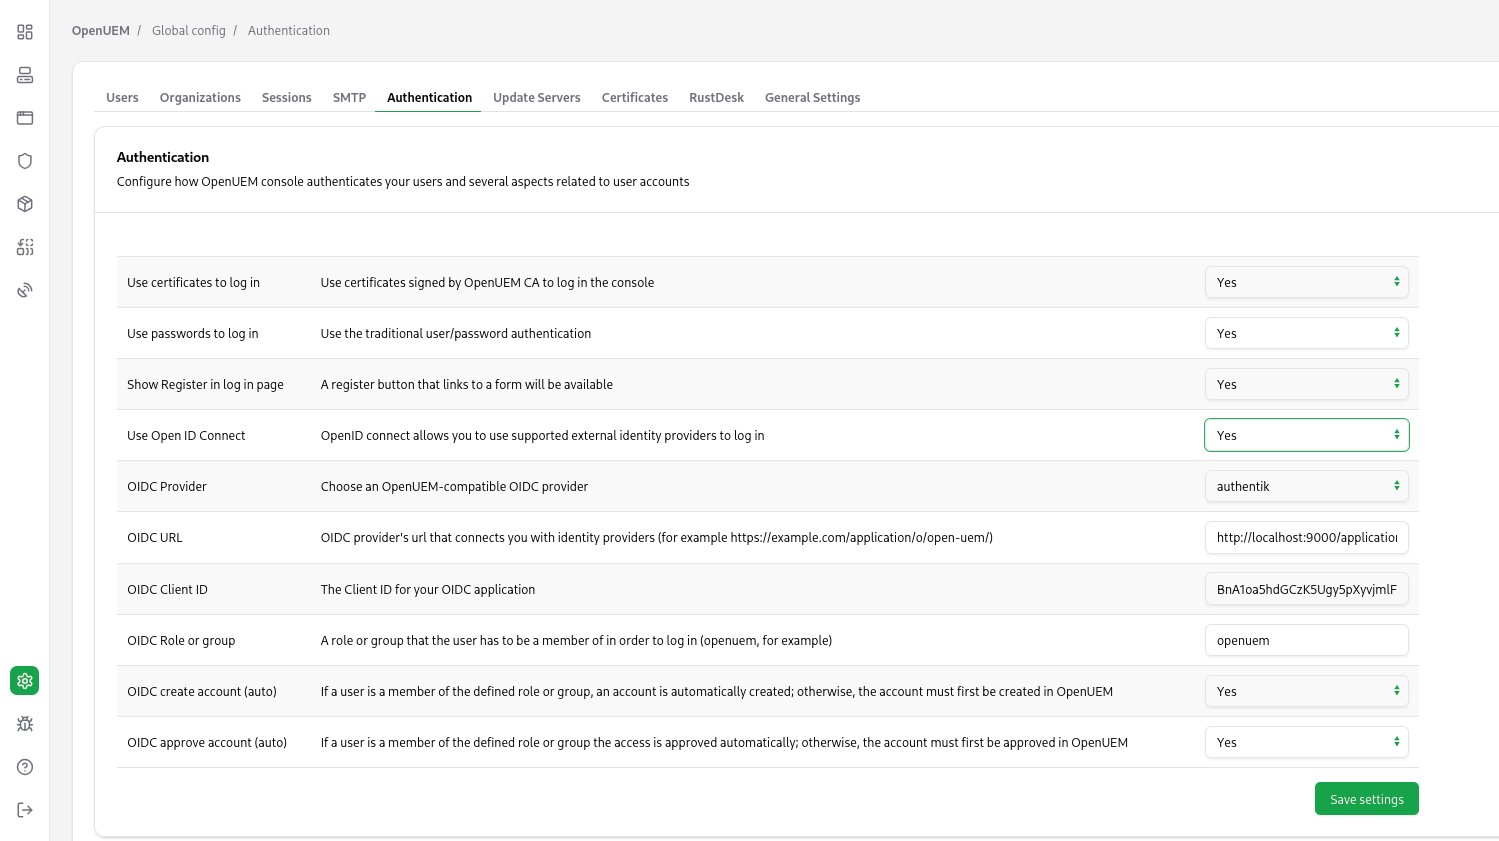
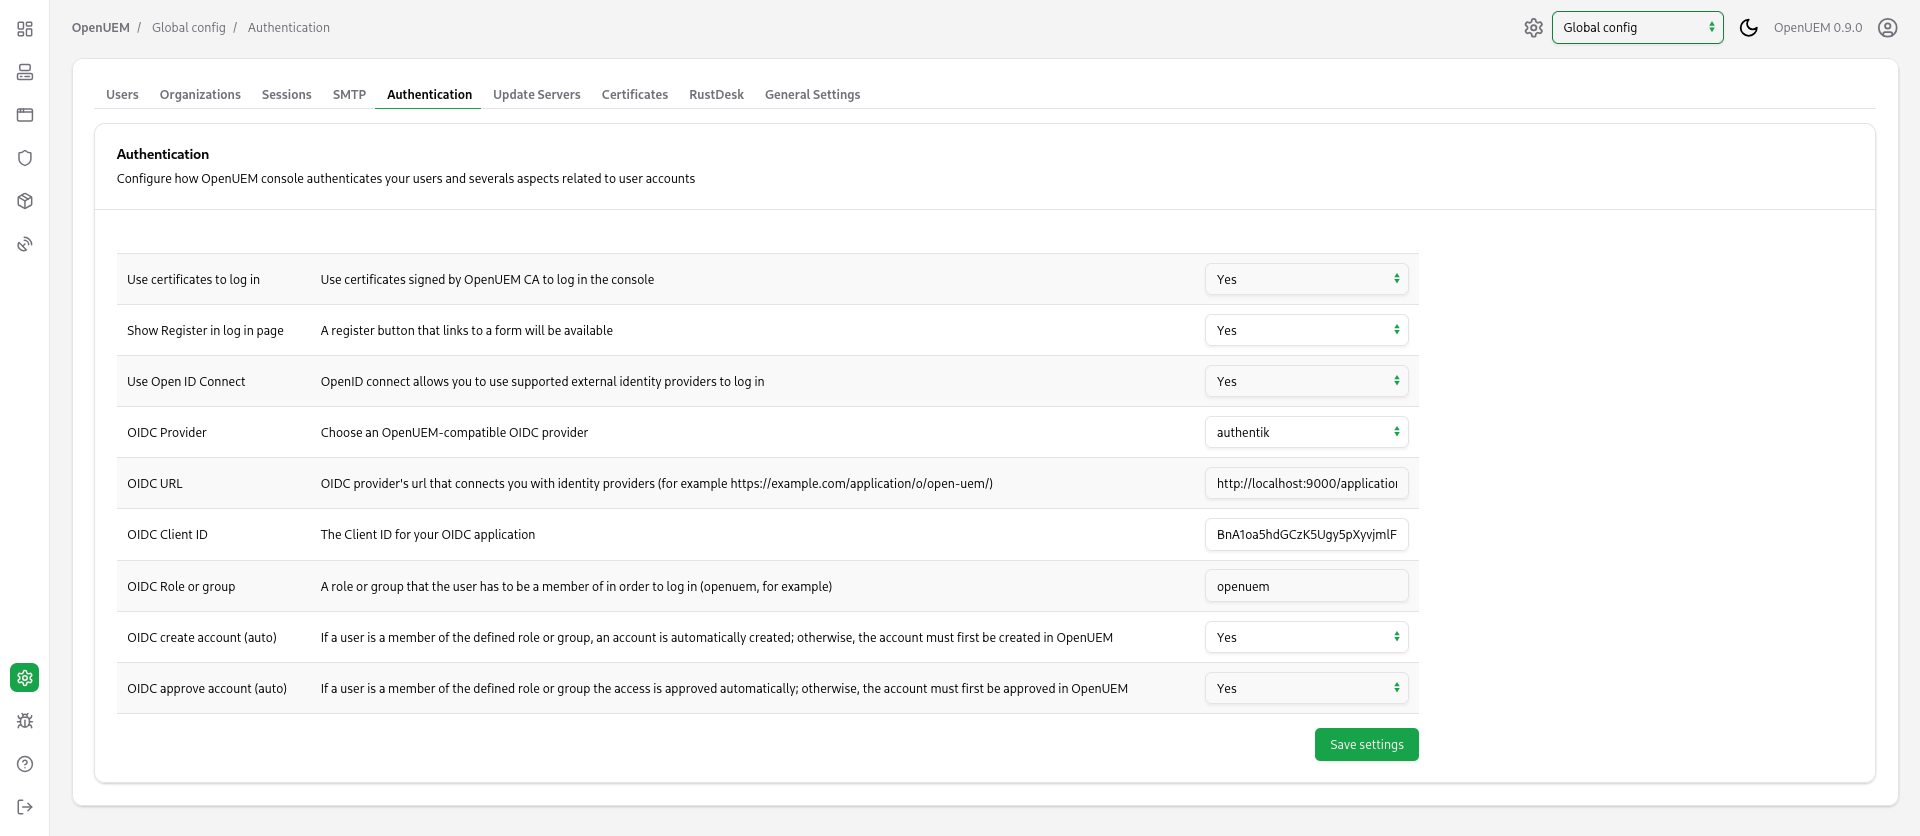
The Authentication tab in the Global Configuration (click on the cog icon in the navigation bar) allows you to:
- Enable or disable the use of username/password to log into the system.
- Enable or disable the use of digital certificates to log into the system.
- Show or hide the Register button in the login page. The Register button allows users to create a new account and ask for a digital certificate to log in.
- Show or hide the Login with OpenID Connect button.
- Select one of the supported providers if you want to use OpenID Connect.
- Force OpenUEM to create automatically an account that is linked to the user that logs in with your Identity Provider, or choose that you must create an account in OpenUEM that shares the username used with your Identity Provider before the user logs in.
- Force OpenUEM to approve automatically the account that is created when a user logs in with your Identity Provider, or choose to block the access to OpenUEM until you approve that account.
- Configure specifics settings for the selected OpenID Connect provider.
How to configure OIDC
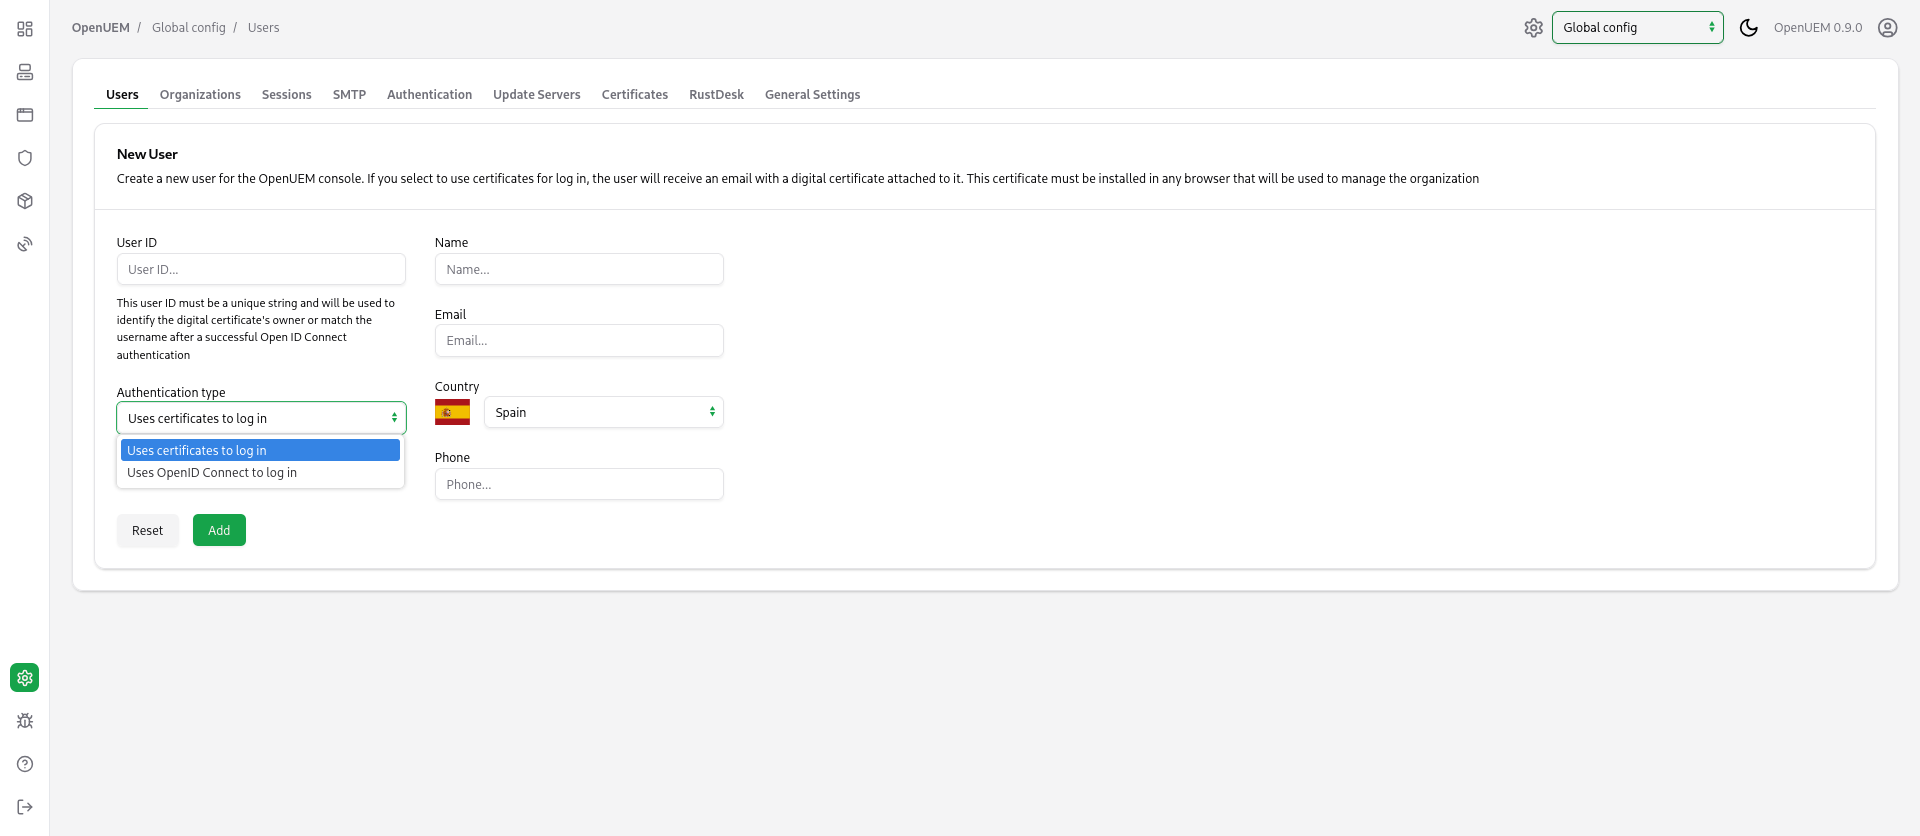
If you want to create a user account, before the user logs in, you can do it from the Users tab in the Global Configuration. You must specify the username that exists in your Identity Provider, fill in the account data, and select the authentication type.
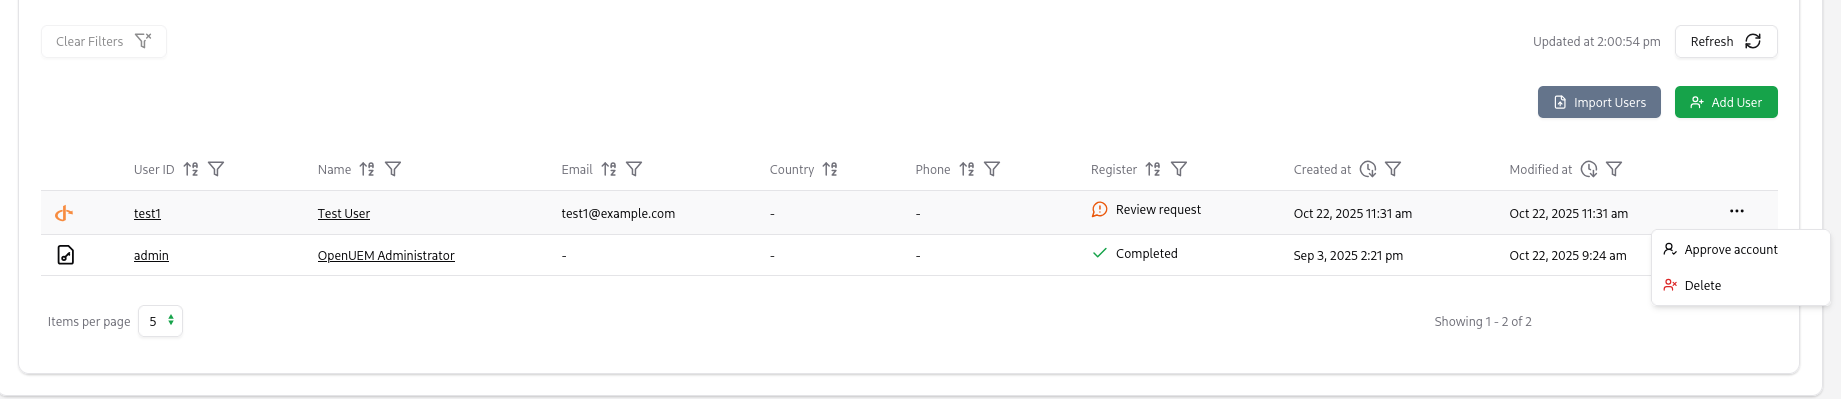
If you enable the manual approval of accounts, you must visit the Users tab and click on the three dots button to approve an account, so the user is allowed access after the user logs into your Identity Provider
Let’s check now, how you can configure OpenUEM to connect to your provider
Authelia
This section discusses how you can create an application in Authentik and configure OpenUEM so you can log in to the console using this Identity Provider.
This section assumes that you have a user created in Authelia (for example, mytest) that uses a password to log in, and that this user is a member of a group (for example, openuem). This documentation doesn’t explain how you can create users or groups, use passkeys, external authentication, 2FA..., please refer to Authelia’s documentation to learn more about those topics or ask for help in OpenUEM Discord channel.
Here’s the sample configuration that I use in Authelia’s configuration.yml file to create an OpenID Connect client. We must give an ID to the client and set redirect URI, which should be the URL that you use to log into the console followed by /oidc/callback. Please use the rest of the settings in this example to configure your client.
    clients:
      - client_id: openuem
        client_name: OpenUEM
        client_secret: ""
        public: true
        require_pkce: true
        pkce_challenge_method: S256
        authorization_policy: one_factor
        consent_mode: implicit
        token_endpoint_auth_method: none
        grant_types:
          - authorization_code
        response_types:
          - code
        redirect_uris:
          - https://rohan.openuem.lab:1323/oidc/callback
        scopes:
          - openid
          - offline_access
          - profile
          - email
          - phone
          - groups
        userinfo_signed_response_alg: none
        access_token_encrypted_response_alg: none
Also, in your user database (users.yml) you should add a group to your users. OpenUEM will check if the user is a member of that group to allow access. In this example I'm using openuem.
  test4:
    disabled: false
    displayname: "Test User"
    email: test4@example.com
    password: "$argon2id$v=19$m=32768,t=1,p=8$eUhVT1dQa082YVk2VUhDMQ$E8QI4jHbUBt3EdsU1NFDu4Bq5jObKNx7nBKSn1EYQxk"  # Password is 'authelia'
    groups:
      - openuem
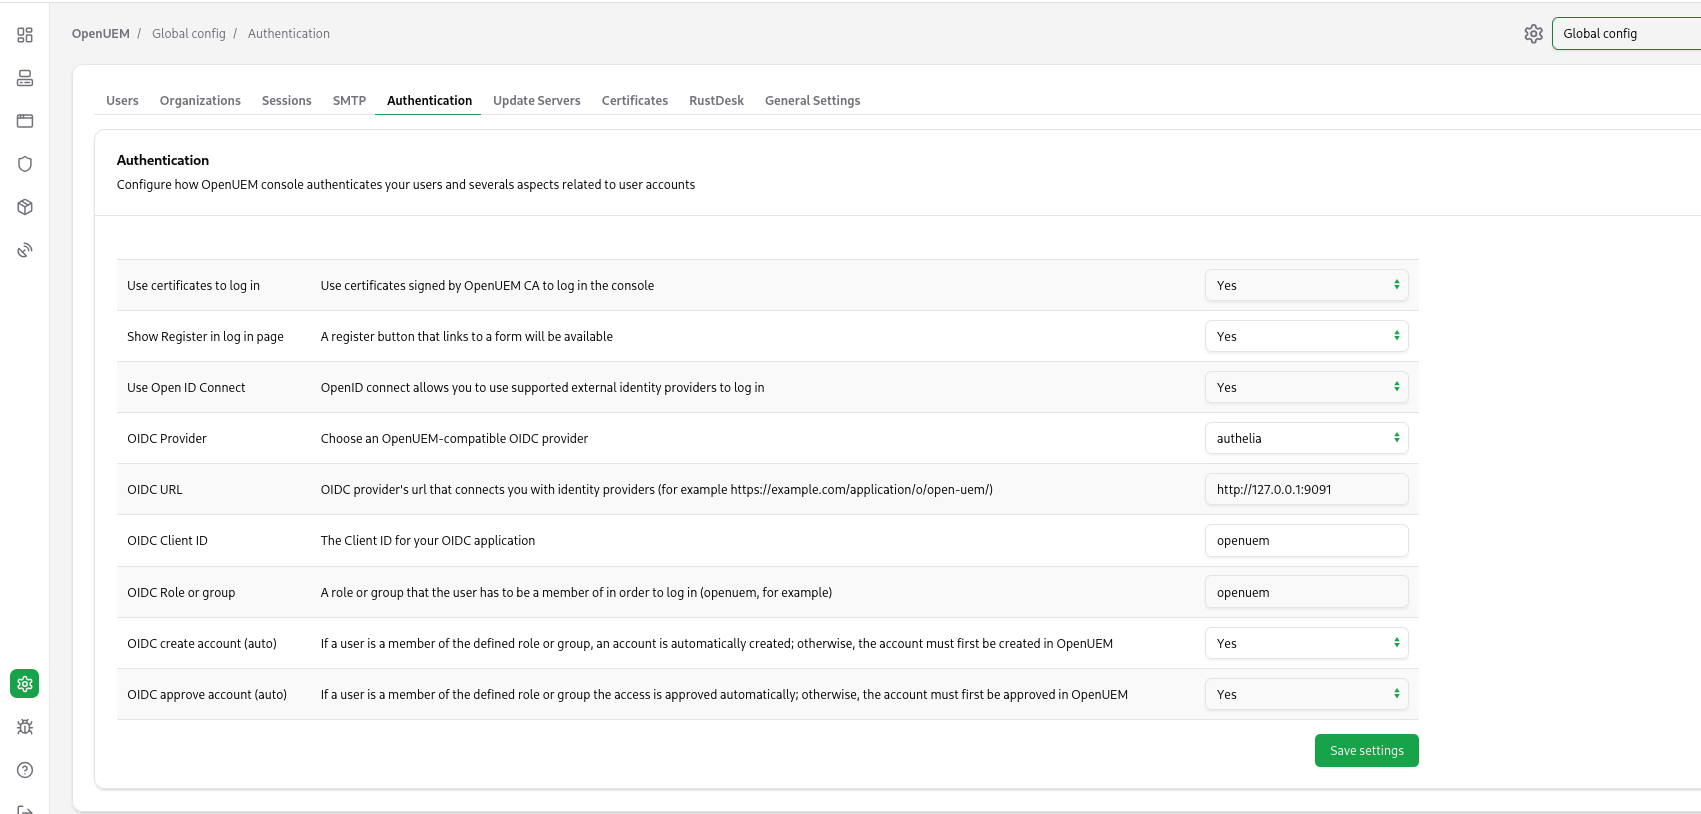
It’s time to go to OpenUEM and configure the Authelia provider. Let’s visit the Global configuration and click the Authentication tab. Here we can manage how OpenUEM authenticates users. You must add the Client ID, the URL that OpenUEM will be used to communicate with Authelia (which is the url used by your service in my example http://127.0.0.1:9091) and the name of the group that the user must be a member of.
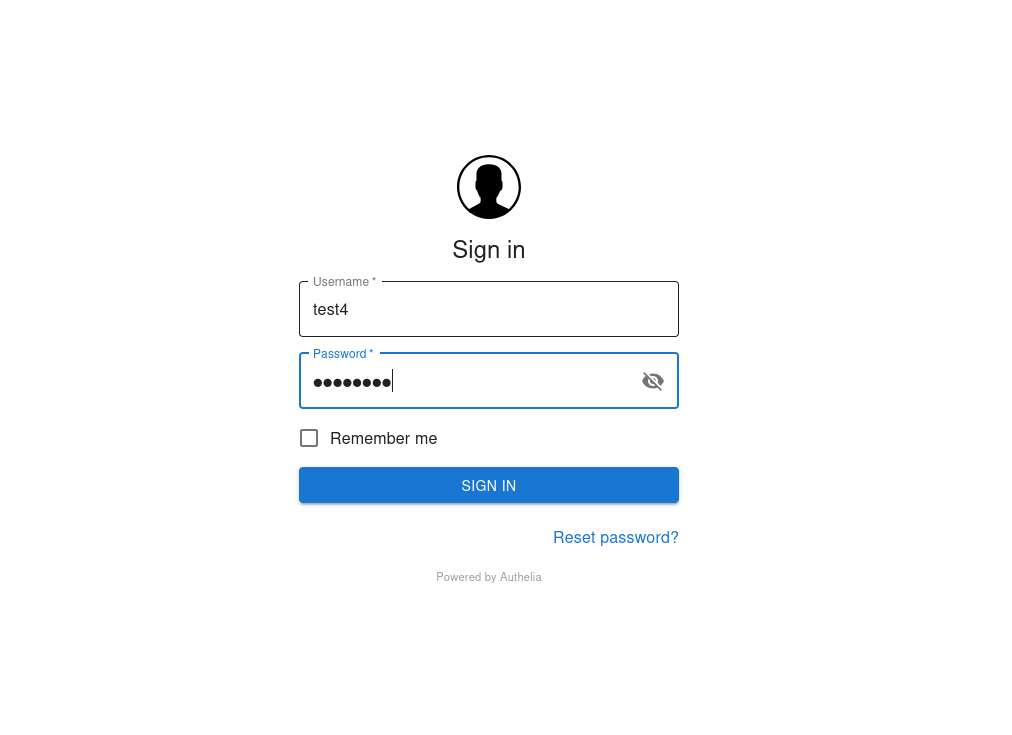
Once you save the required settings for Authelia, when you click the Login with OpenID Connect button, you should be redirected to Authelia's login page.
After a successful log in, you should see OpenUEM’s dashboard.
Authentik
This section discusses how you can create an application in Authentik and configure OpenUEM so you can log in to the console using this Identity Provider.
This section assumes that you have a user created in Authentik (for example, test1) that uses a password to log in, and that this user is a member of a group (for example, openuem). This documentation doesn’t explain how you can create users or groups, use passkeys, external authentication, 2FA..., please refer to Authentik’s documentation to learn more about those topics or ask for help in OpenUEM Discord channel.
Let’s see how we create the OpenUEM application in Authentik.
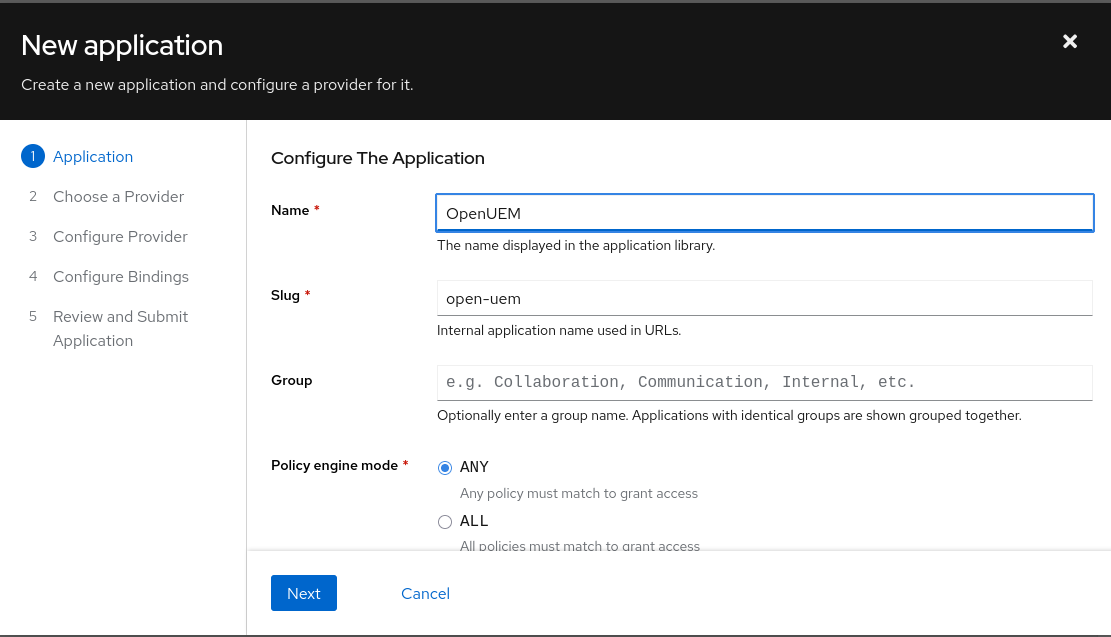
We start with the wizard to create a new application. We can give the app the name OpenUEM and go to the next step.
The OpenUEM application uses the OpenID Connect provider type.

The OAuth2/OpenID Connect provider is configured using the implicit consent (automatically proceeds to OpenUEM console after the user logs in to authentik, with no extra approval step) and the Client type is Public.

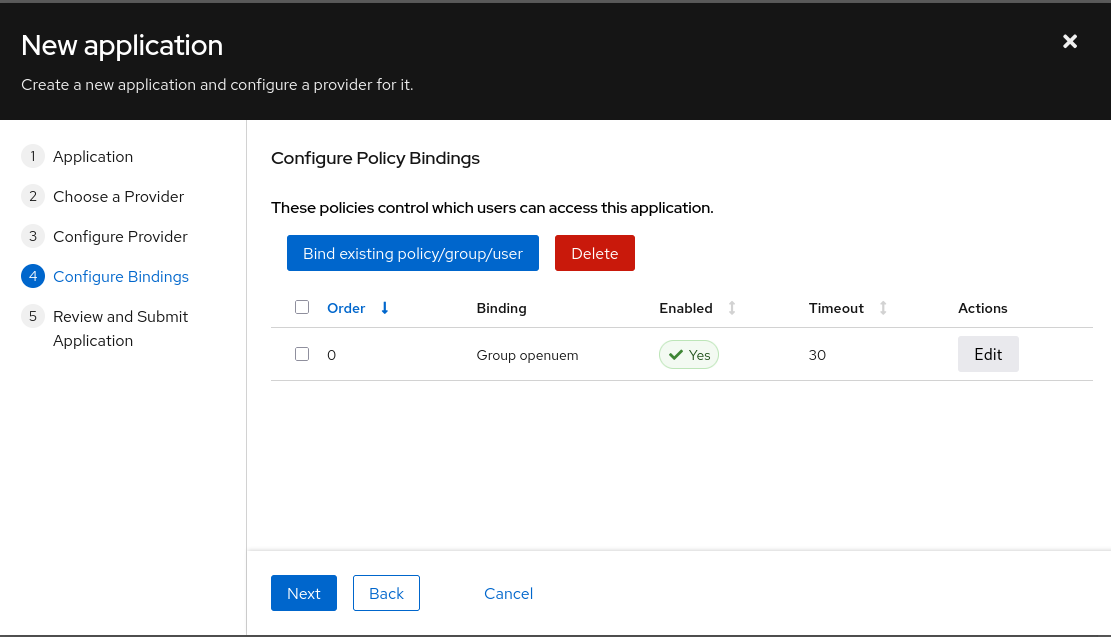
We bind the application to an existing group (for example, openuem).
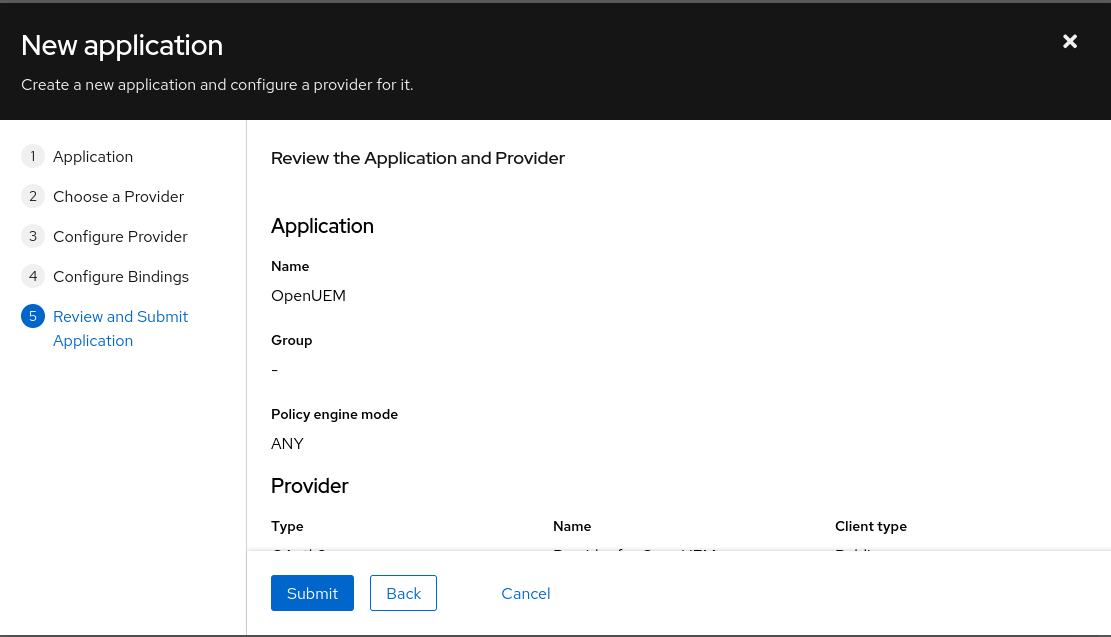
The final step allows you to review the configuration and create the application.
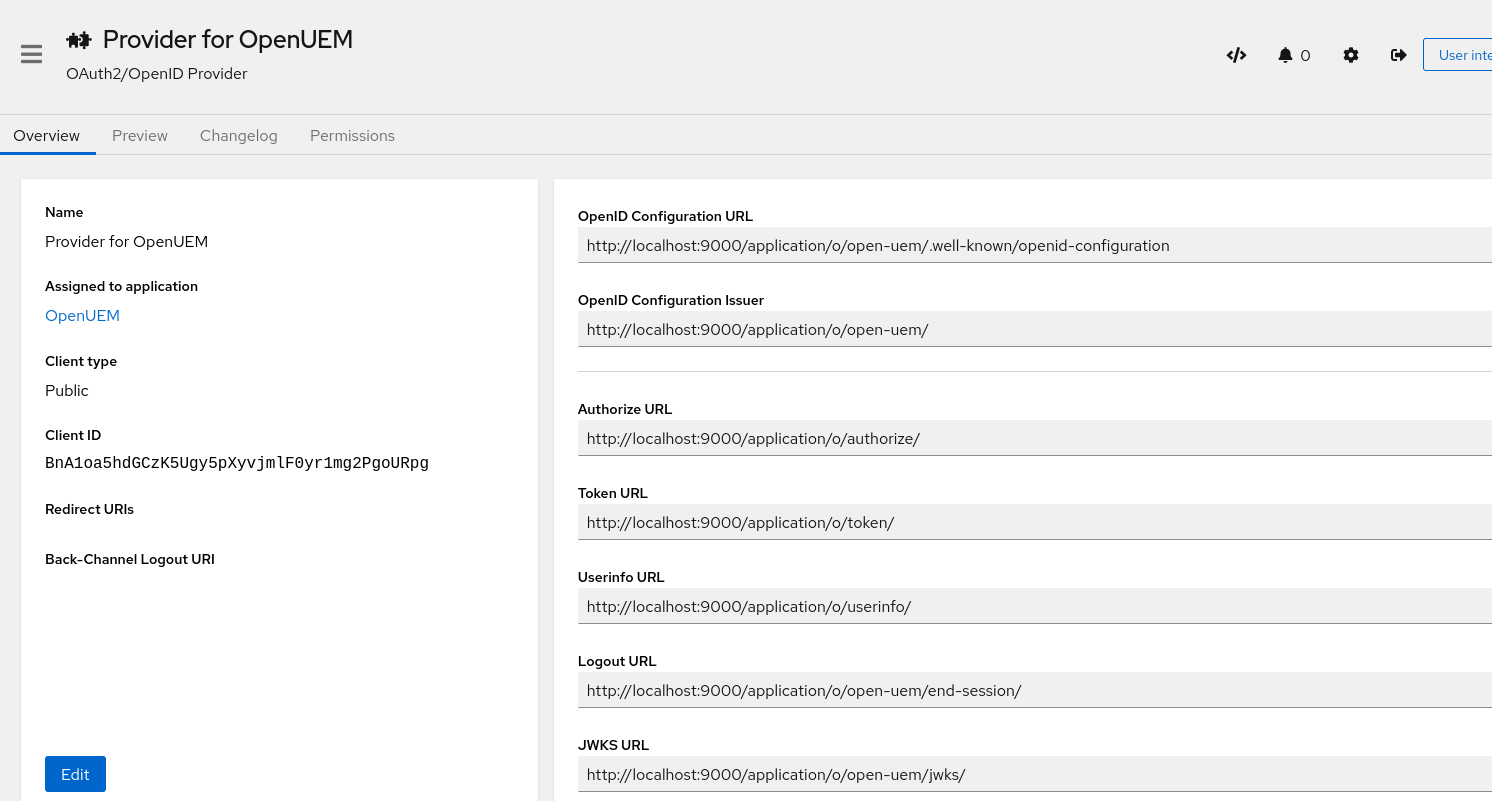
Once the application is created, we can inspect its configuration.
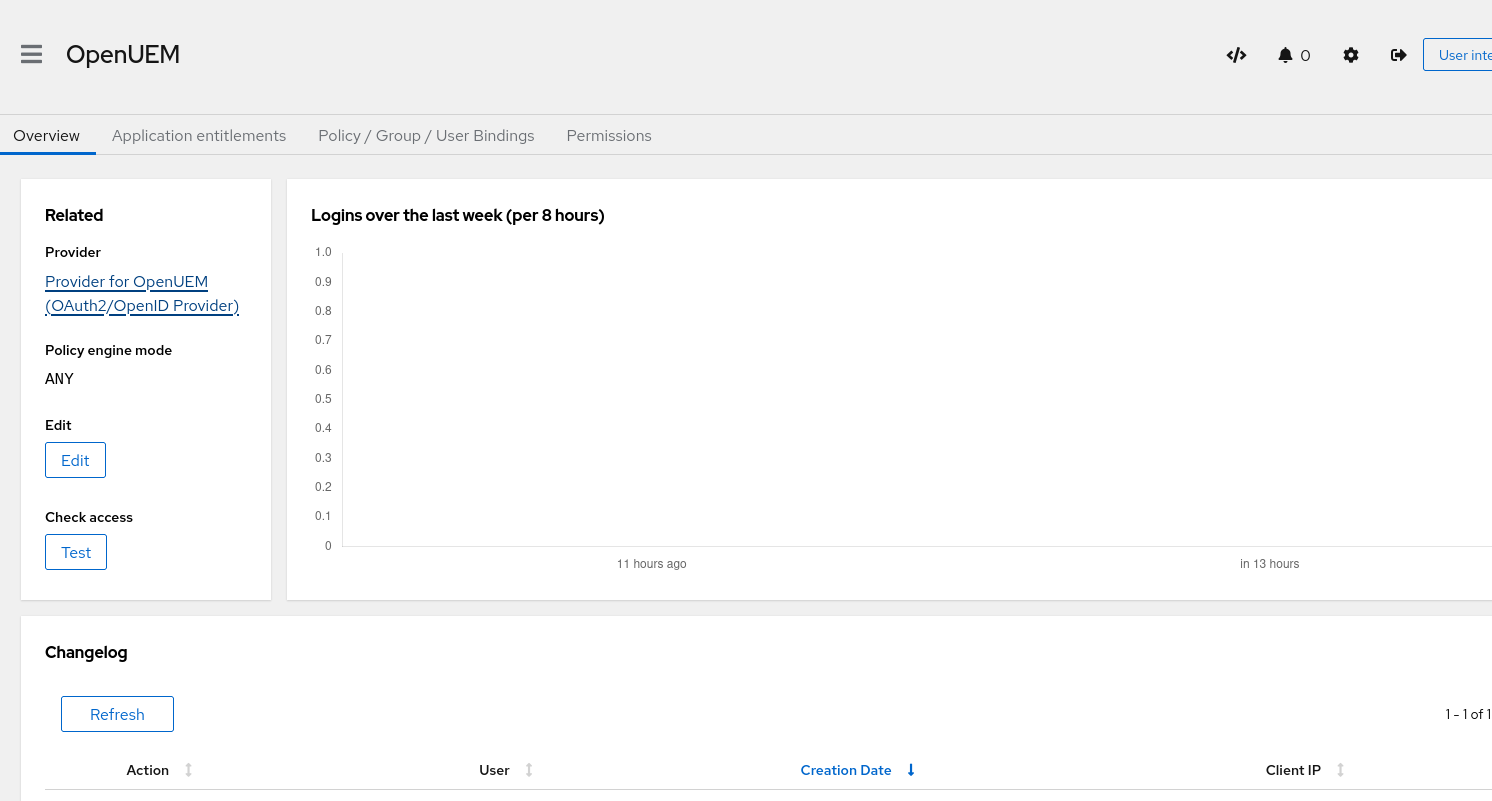
If we click on the Provider for OpenUEM link, a new window will show with some information that we’d need to let OpenUEM know how the OpenID Connect authentication must be performed. We’ll need the Client ID and the OpenID Configuration Issuer url (the slash at the end must be copied to; Authentik’s URLs always end with a slash).
It’s time to go to OpenUEM and configure the Authentik provider. Let’s visit the Global configuration and click the Authentication tab. Here we can manage how OpenUEM authenticates users. You must add the Client ID, the URL that OpenUEM will be used to communicate with Authentik and the name of the group that the user must be a member of.
Once you save the required settings for Authentik, when you click the Login with OpenID Connect button, you should be redirected to Authentik’s login page.

After a successful log in, you should see OpenUEM’s dashboard.
Keycloak
This section discusses how you can create an application in Keycloak and configure OpenUEM so you can log in to the console using this Identity Provider.
This section assumes that you have a user created in Keycloak (for example, test2) that uses a password to log in, and that this user is a member of a group (for example, openuem). This documentation doesn’t explain how you can create users or groups, use passkeys, external authentication, 2FA..., please refer to Keycloak’s documentation to learn more about those topics or ask for help in OpenUEM Discord channel.
Let’s see how we create the OpenUEM application in Keycloak.
In this scenario, I work with a Keycloak realm called OpenUEM.
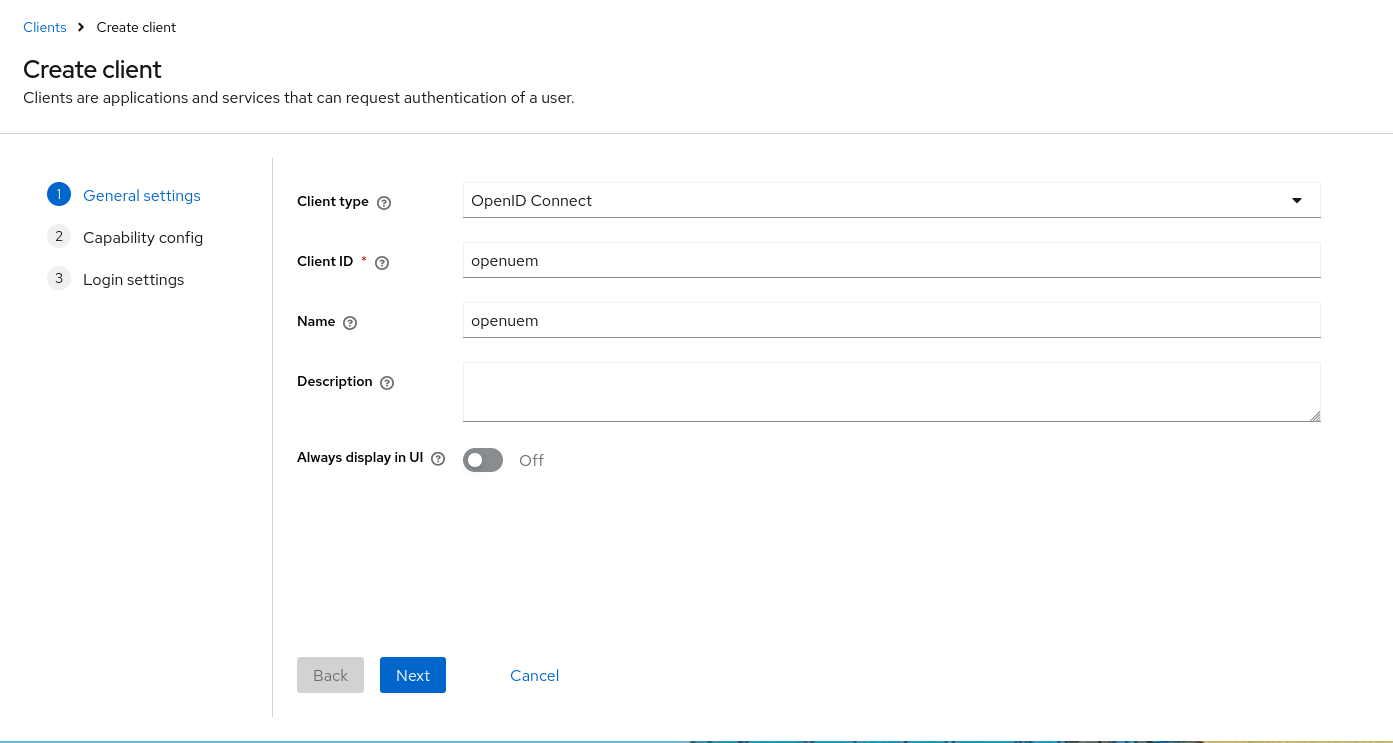
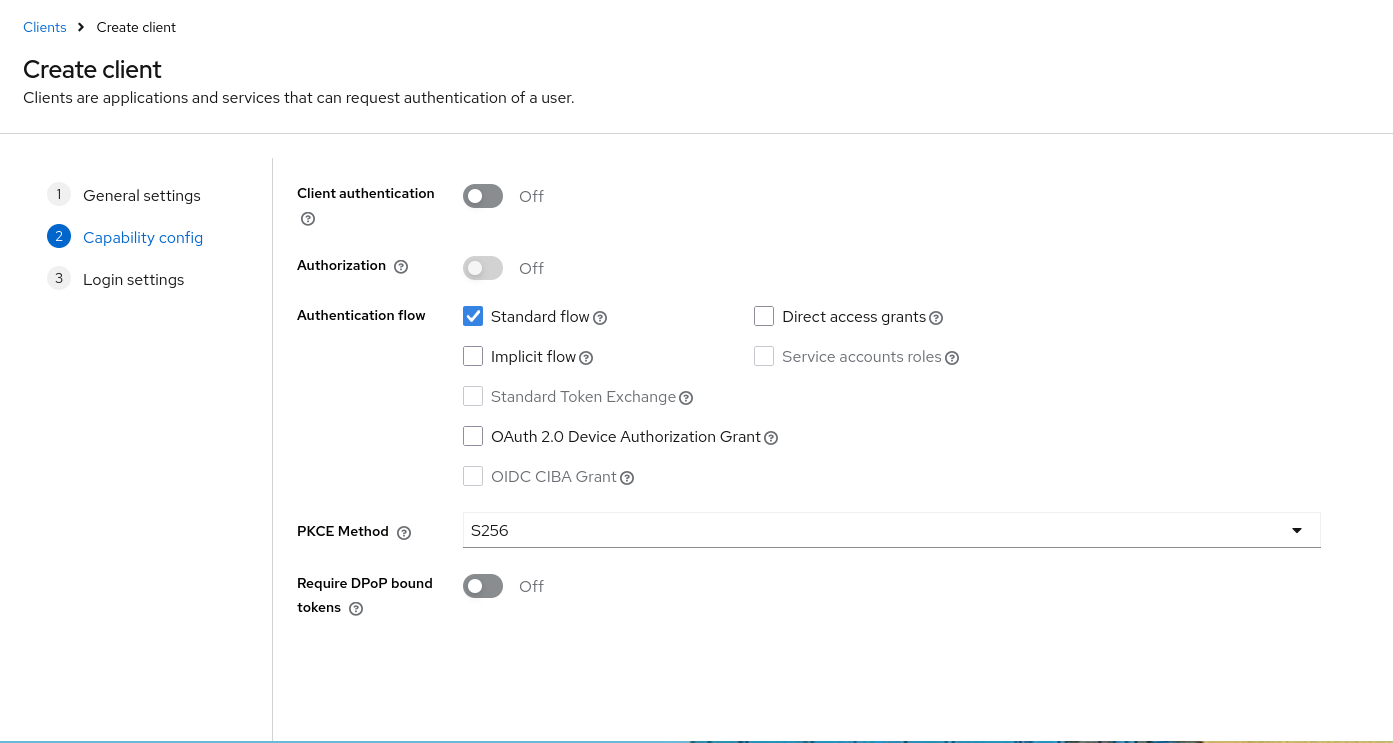
We start with the wizard to create a new client. We select an OpenID Connect client and give it an id (for example: openuem) and a name (for example: openuem) and go to the next step.
In the capability config, we must use the Standard flow and use S256 as the PKCE method.
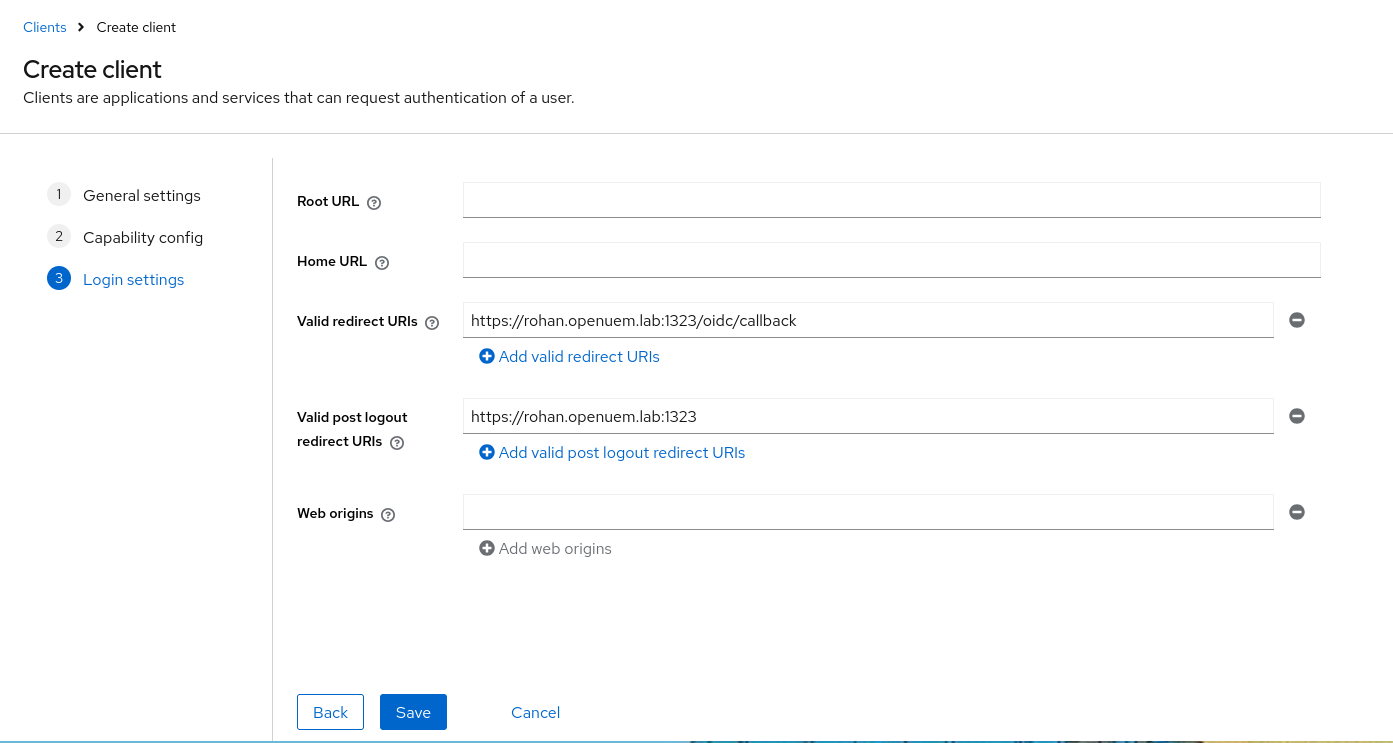
In the login settings config, we must add the redirect URI, which should be the URL that you use to log into the console followed by /oidc/callback, and the post logout URI which should be the URL to log into the console.
Once the client is created, click on the Client Scopes button. We’re going to create a scope that will allow us to get the group that our user is a member of, in response to our attempt to log into the console.
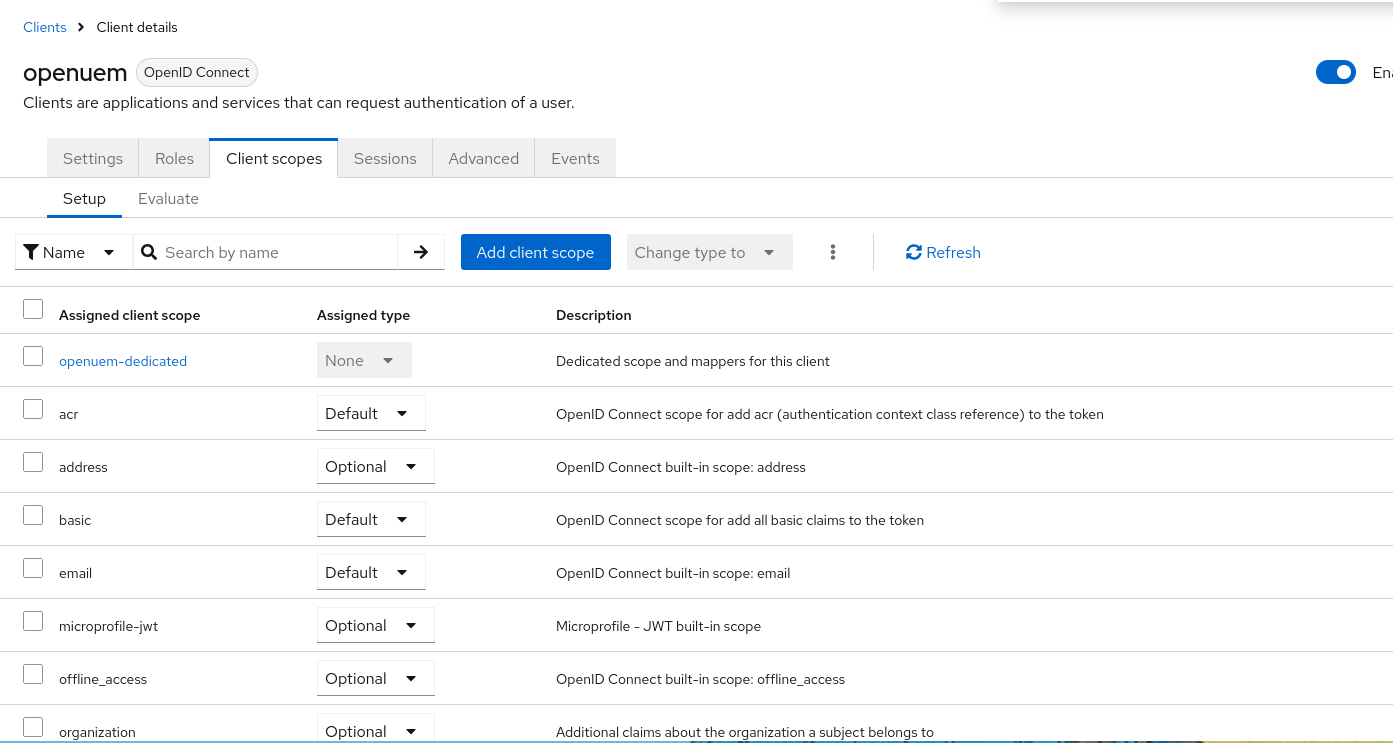
Click on the openuem-dedicated (or the one that has the suffix –dedicated) and then click on Create a new mapper for this scope.
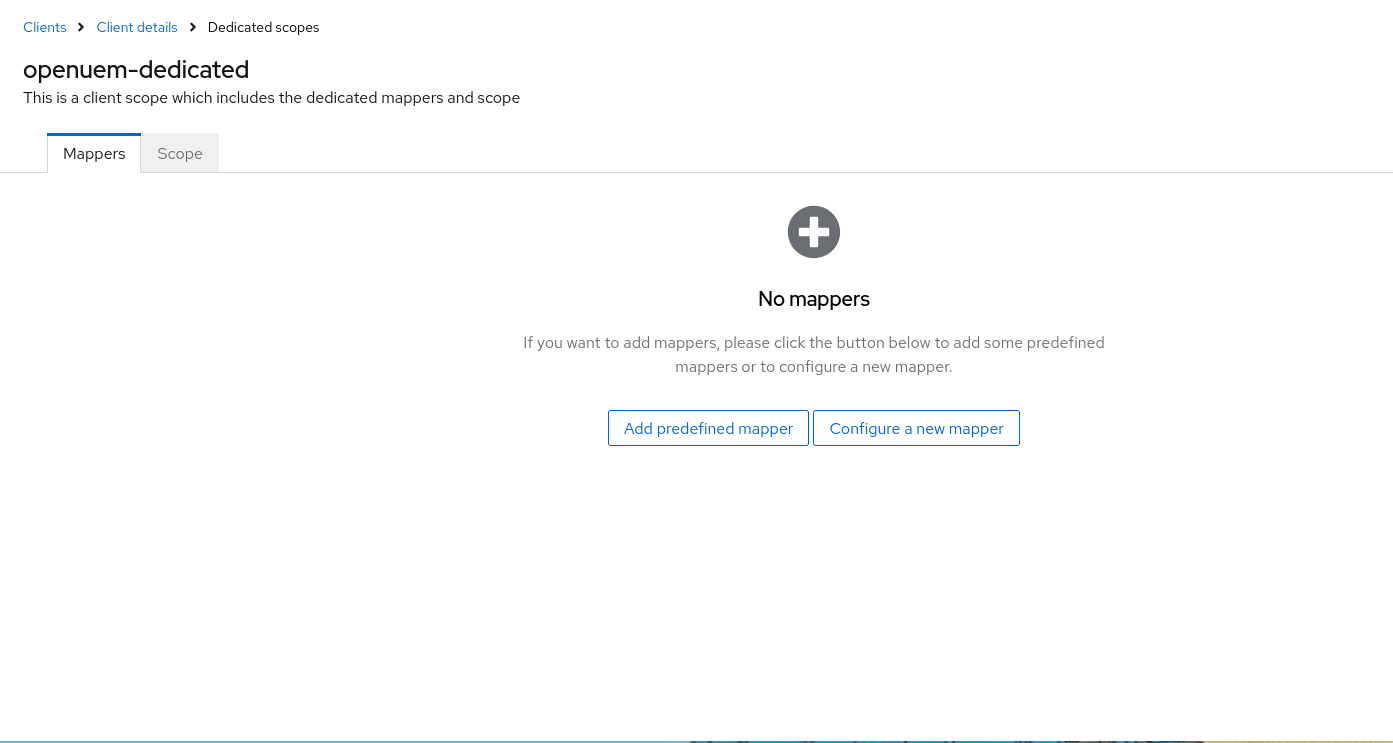
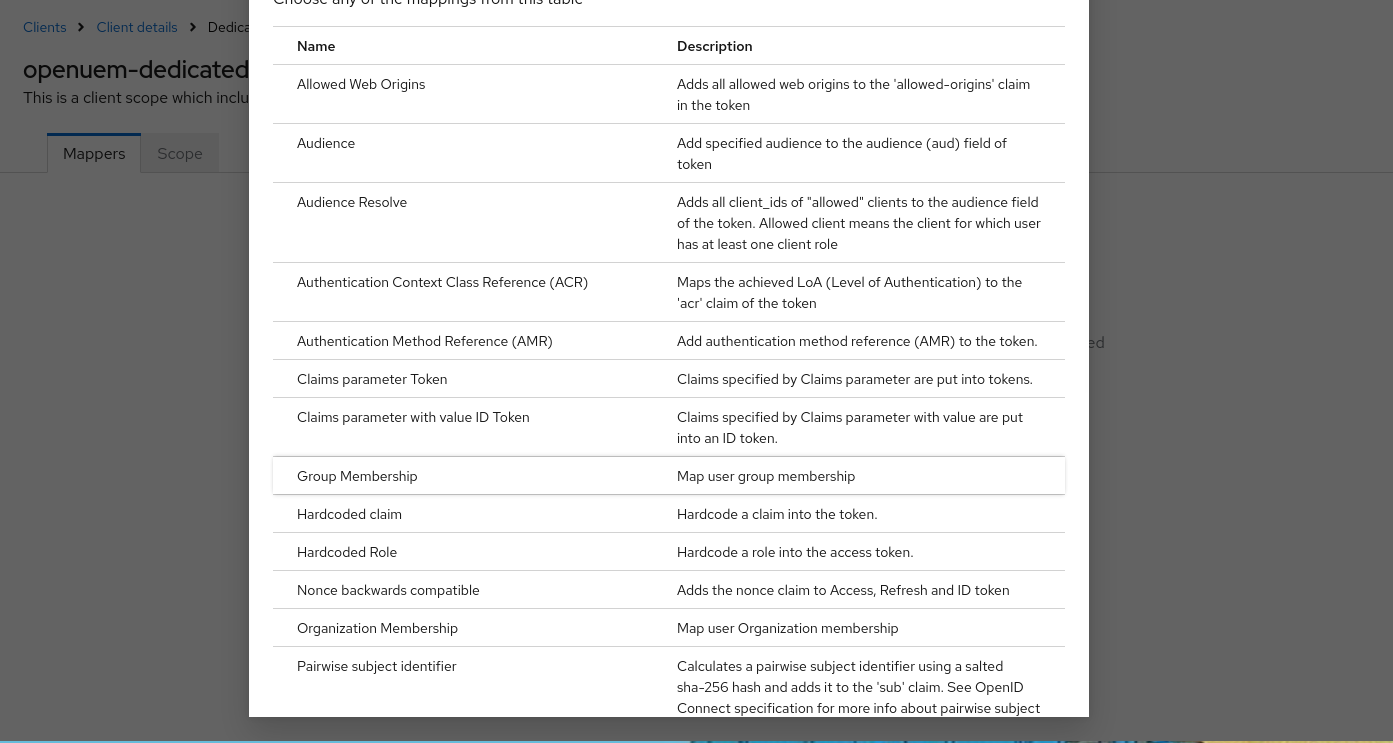
In the new window click on Group Membership
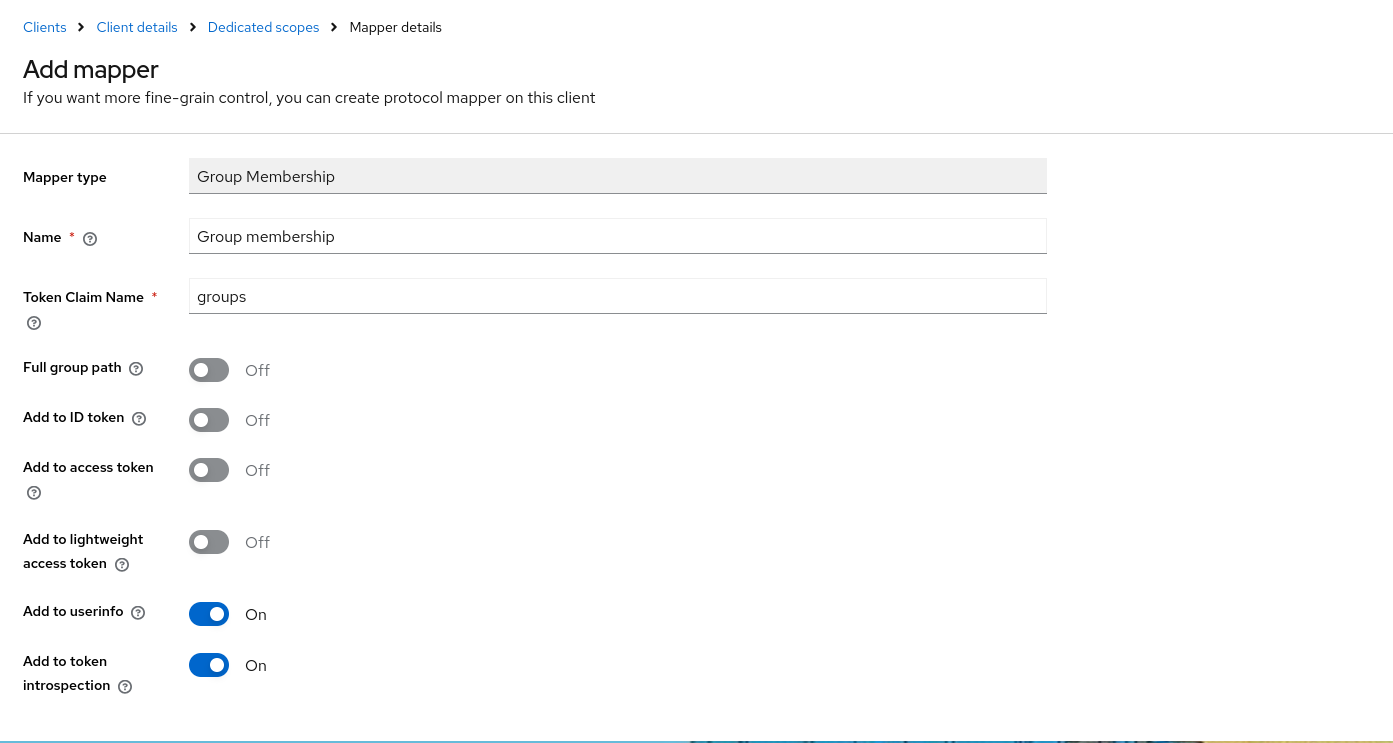
In the mapper definition, we give it a name like Group Membership and use groups as the Token Claim Name. We only must enable the Add to user info and Add to token introspection and leave the rest options as disabled. Click the Save button to finish our mapper definition.
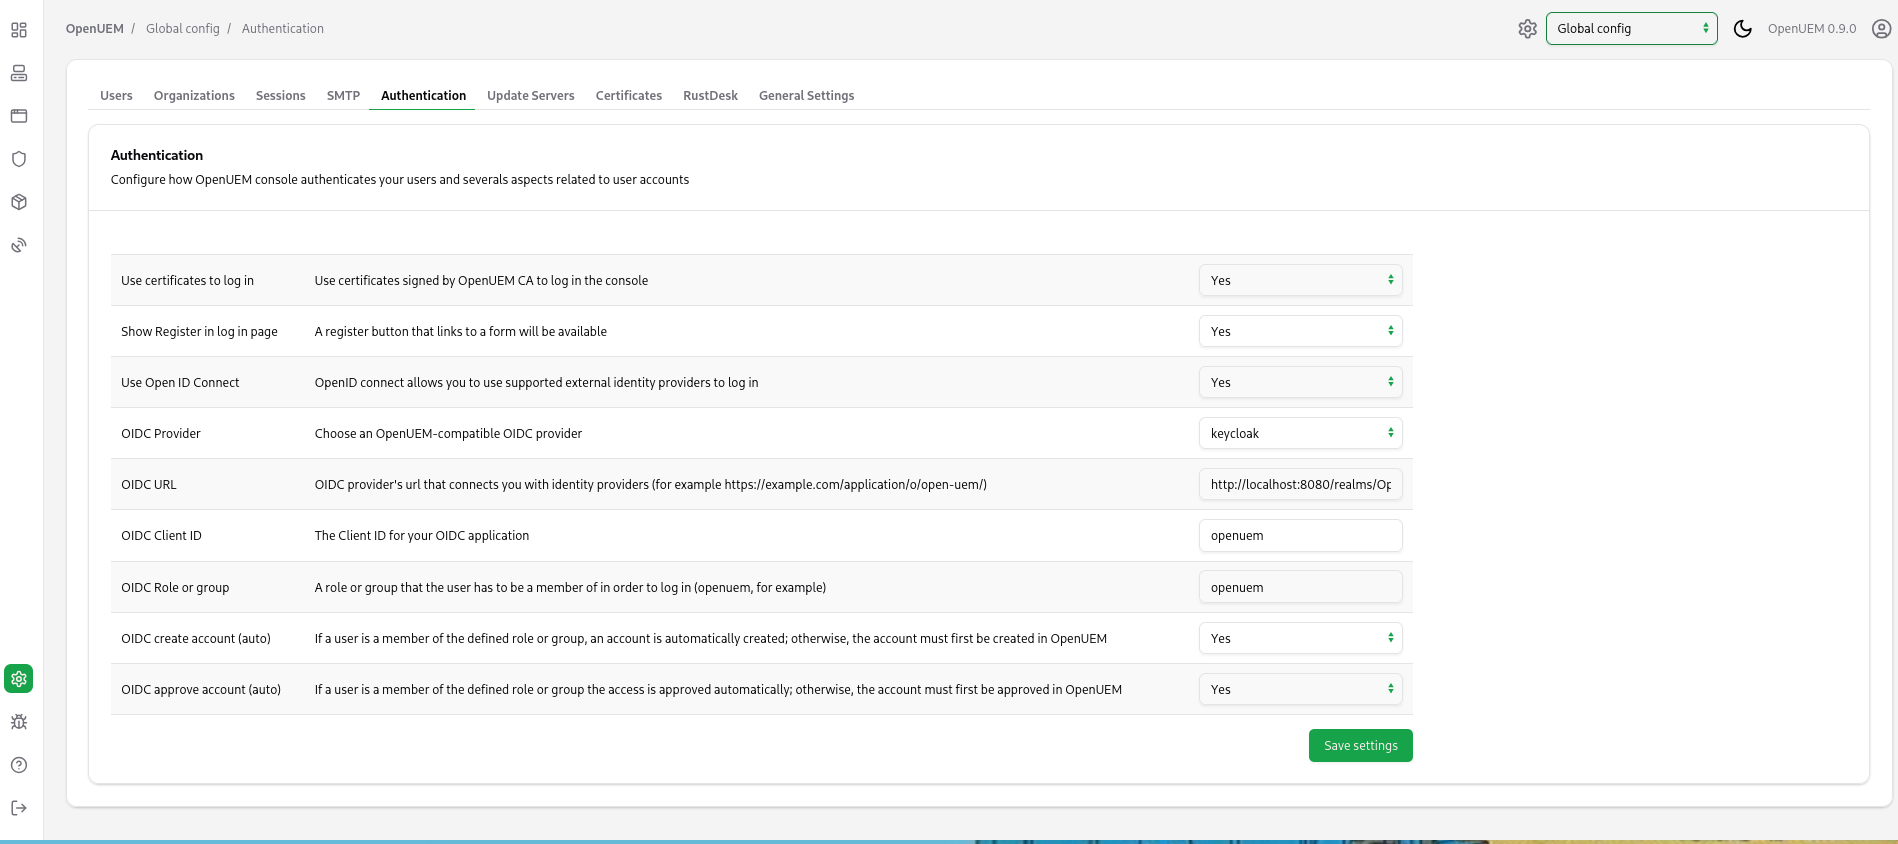
It’s time to go to OpenUEM and configure the Keycloak provider. Let’s visit the Global configuration and click the Authentication tab. Here we can manage how OpenUEM authenticates users. You must add the Client ID (openuem in my example), the URL that OpenUEM will be used to communicate with Keycloak (which is the URL for your Keycloak server followed by /realms/ and the name of your realm, in my example http://localhost:8080/realms/OpenUEM) and the name of the group that the user must be a member of (in my case openuem).
Once you save the required settings for Keycloak, when you click the Login with OpenID Connect button, you should be redirected to Keycloak’s login page.

After a successful log in, you should see OpenUEM’s dashboard.
Zitadel
This section discusses how you can create an application in Zitadel and configure OpenUEM so you can log in to the console using this Identity Provider.
This section assumes that you have a user created in Zitadel (for example, test3) that uses a password to log in, and that this user is a member of a group (for example, openuem). This documentation doesn’t explain how you can create users in Zitadel, use passkeys, external authentication, 2FA..., please refer to Zitadel’s documentation to learn more about those topics or ask for help in OpenUEM Discord channel.
Let’s see how we create the OpenUEM application in Zitadel.
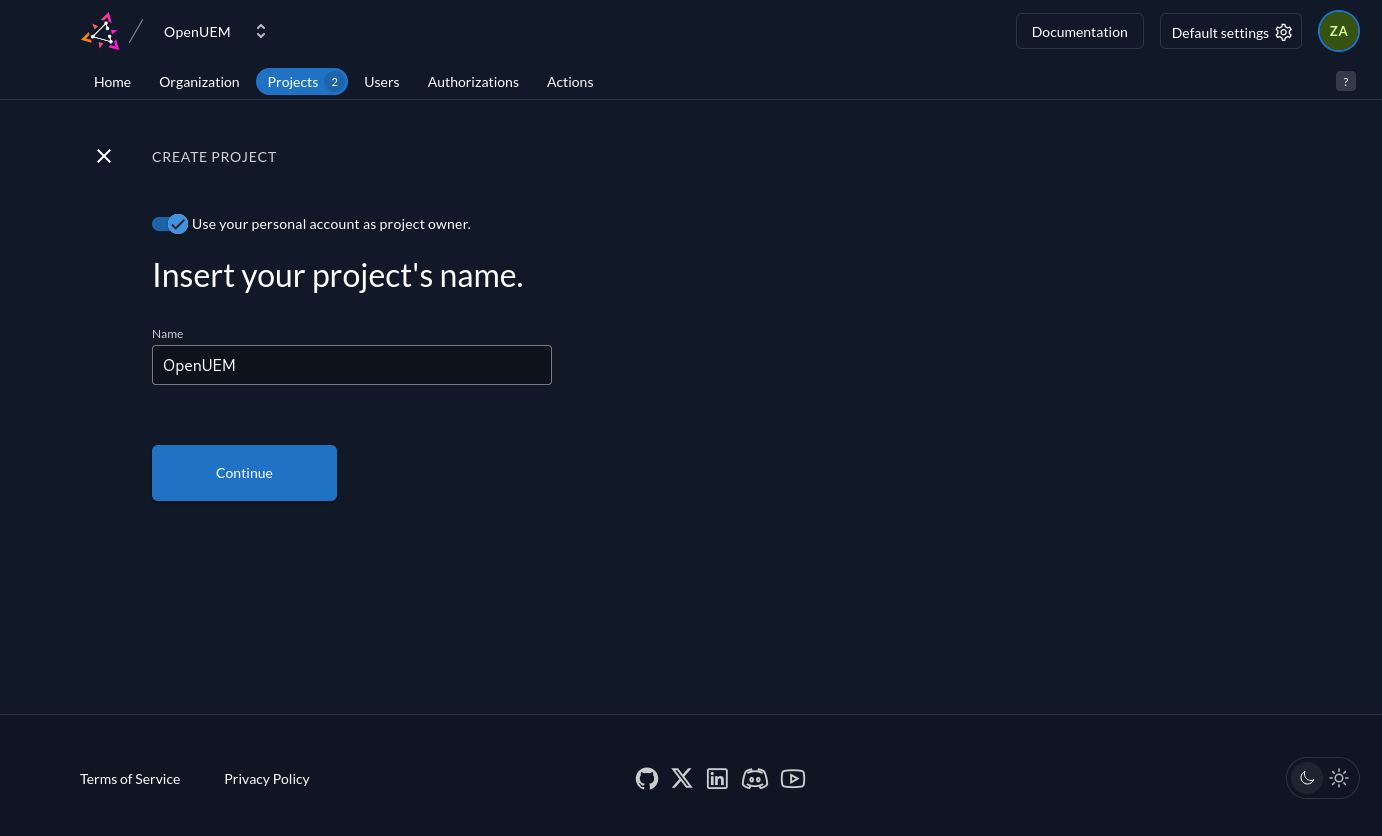
We start with the wizard to create a new project. We give the project a name, for example OpenUEM.
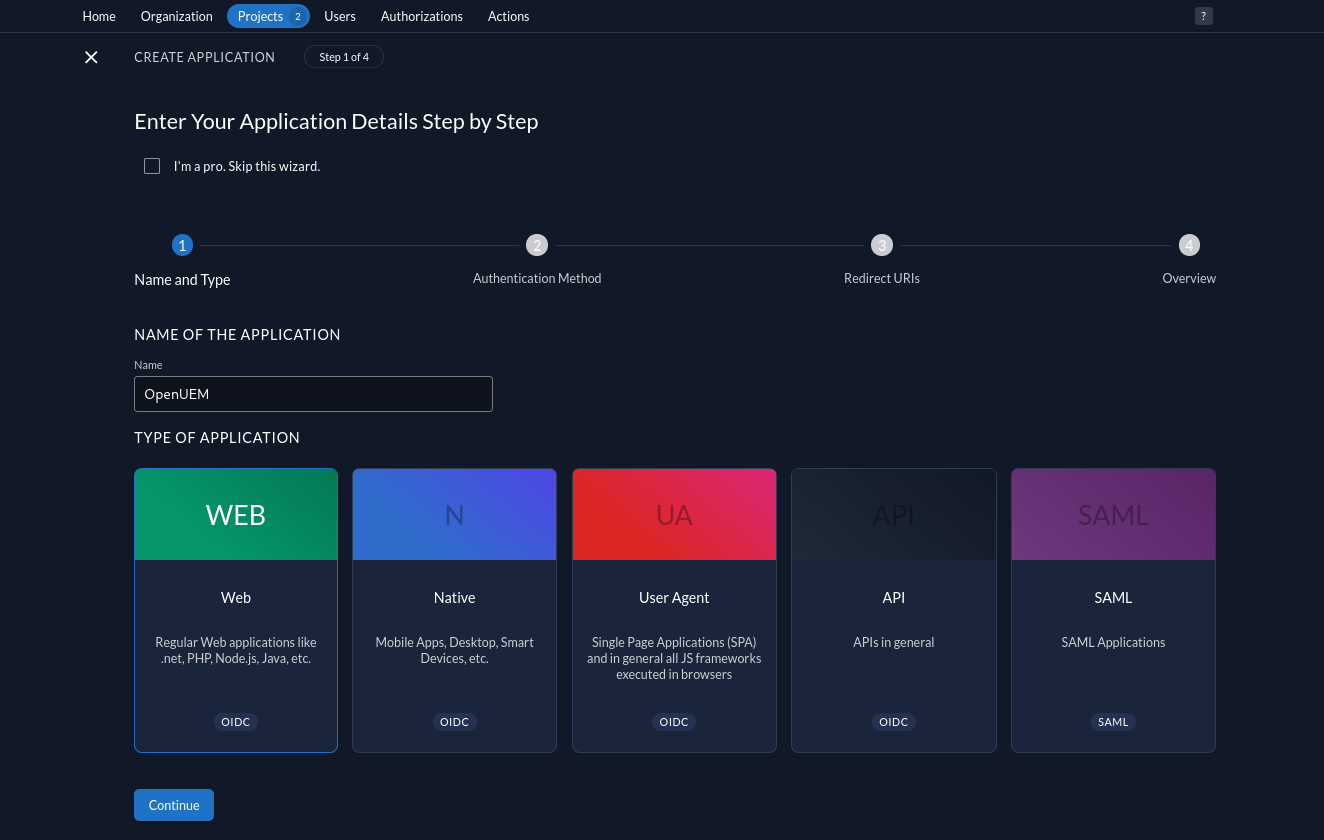
In our new project, we use the button to create a new application. In the first step to create the application, we give it a name (for example, OpenUEM) and chose the Web type.
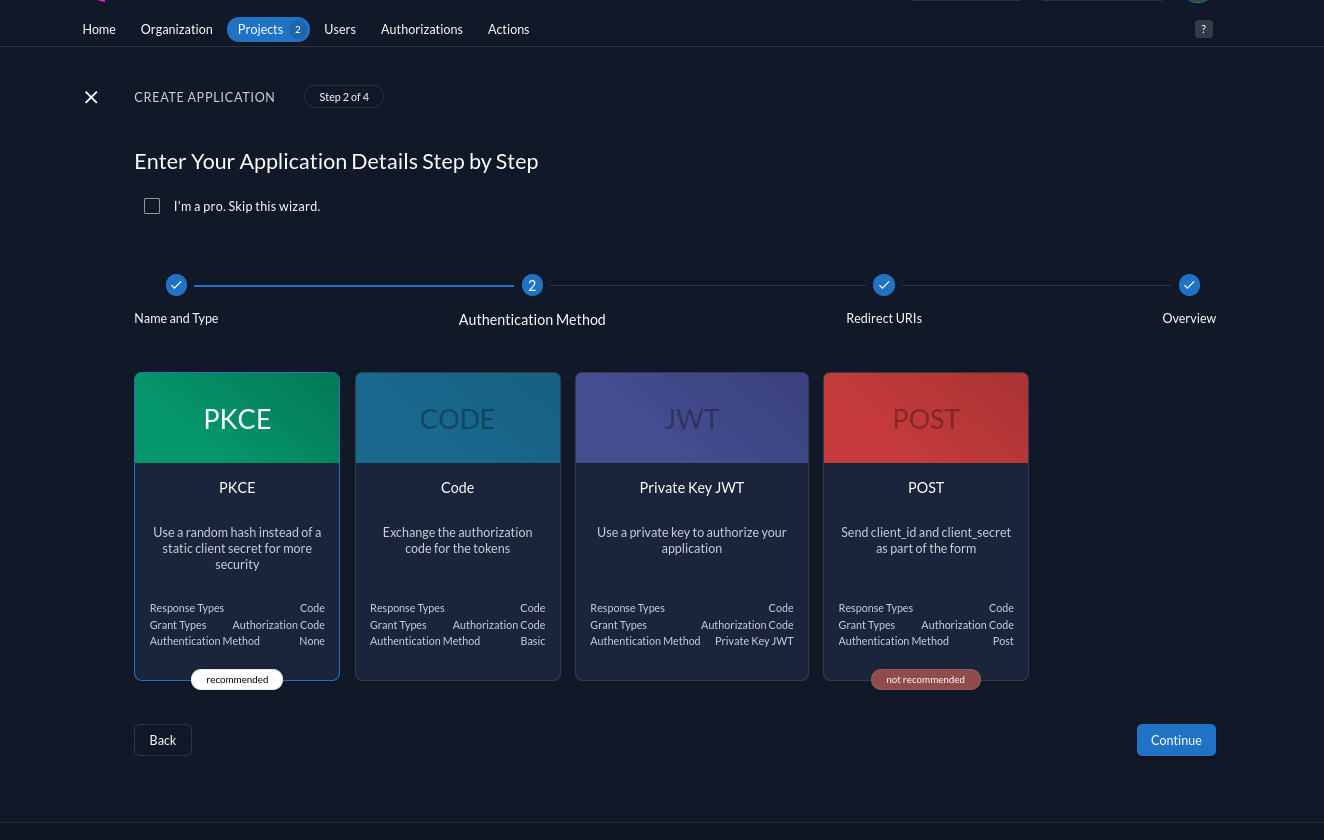
We select PKCE as the authentication type.
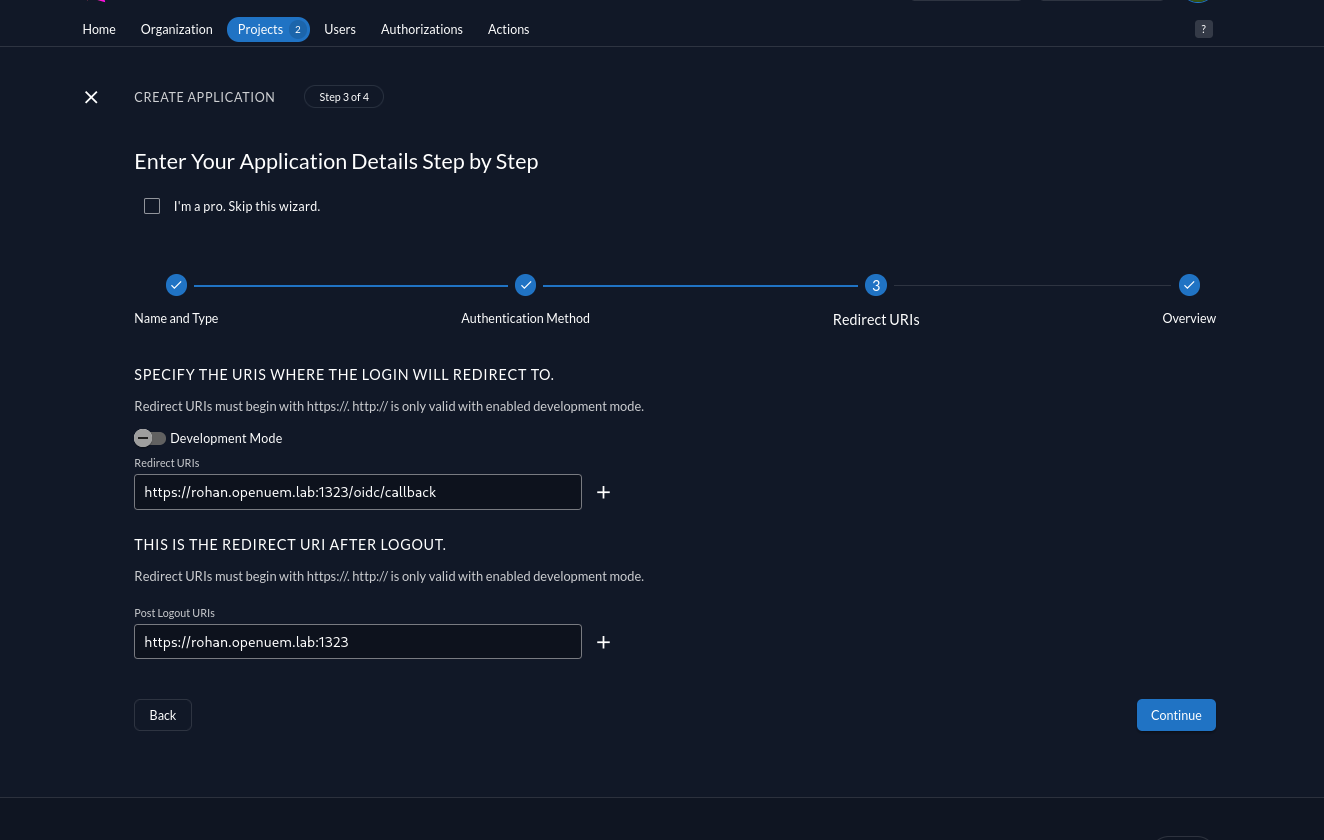
In the login settings config, we must add the redirect URI, which should be the URL that you use to log into the console followed by /oidc/callback, and the post logout URI which should be the URL to log into the console.
Finally, we review the new app and create it.
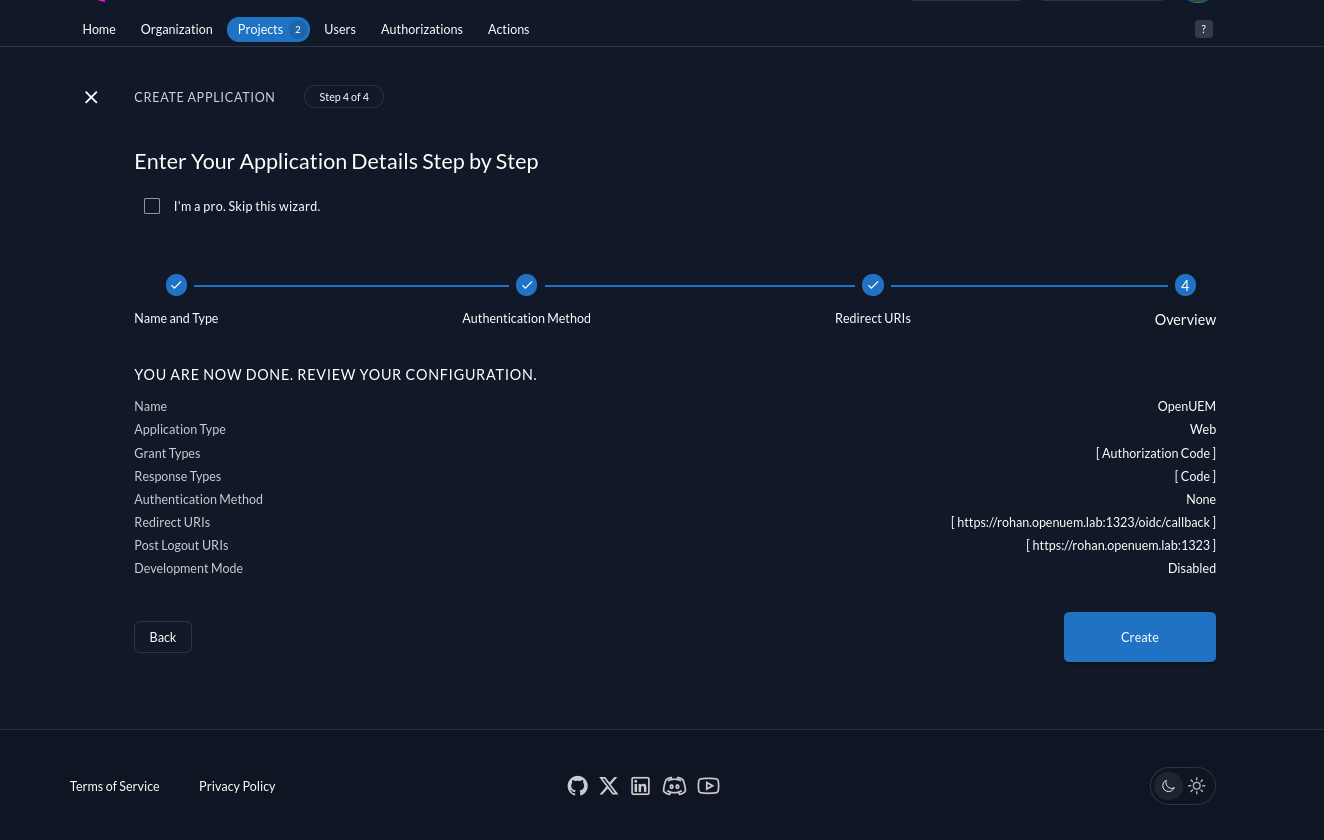
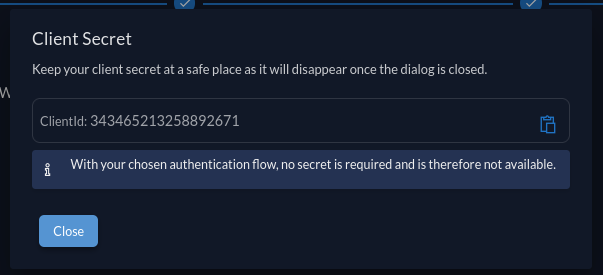
Once we create the application, the Client ID will be shown, we’ve to copy it and store it in a safe place as we’ll use it later when we configure OpenUEM.
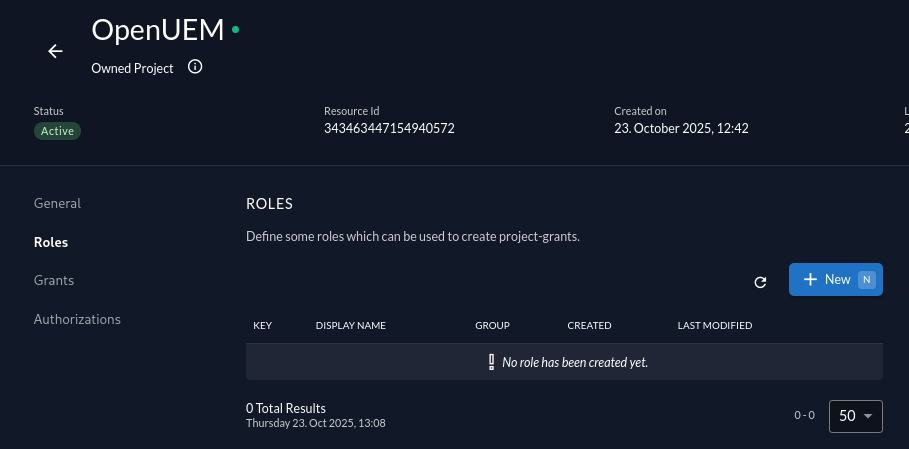
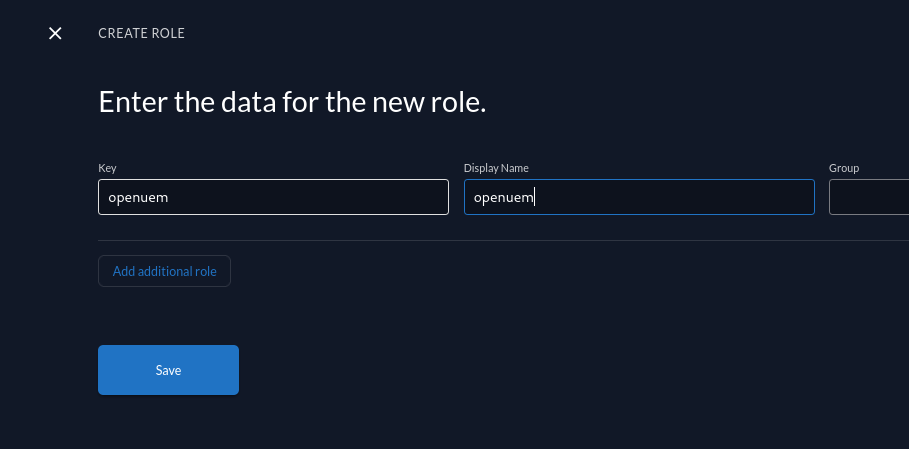
Now, we must go to our OpenUEM project to create a role (for example, openuem) that we’ll use to allow access to users that have this role.
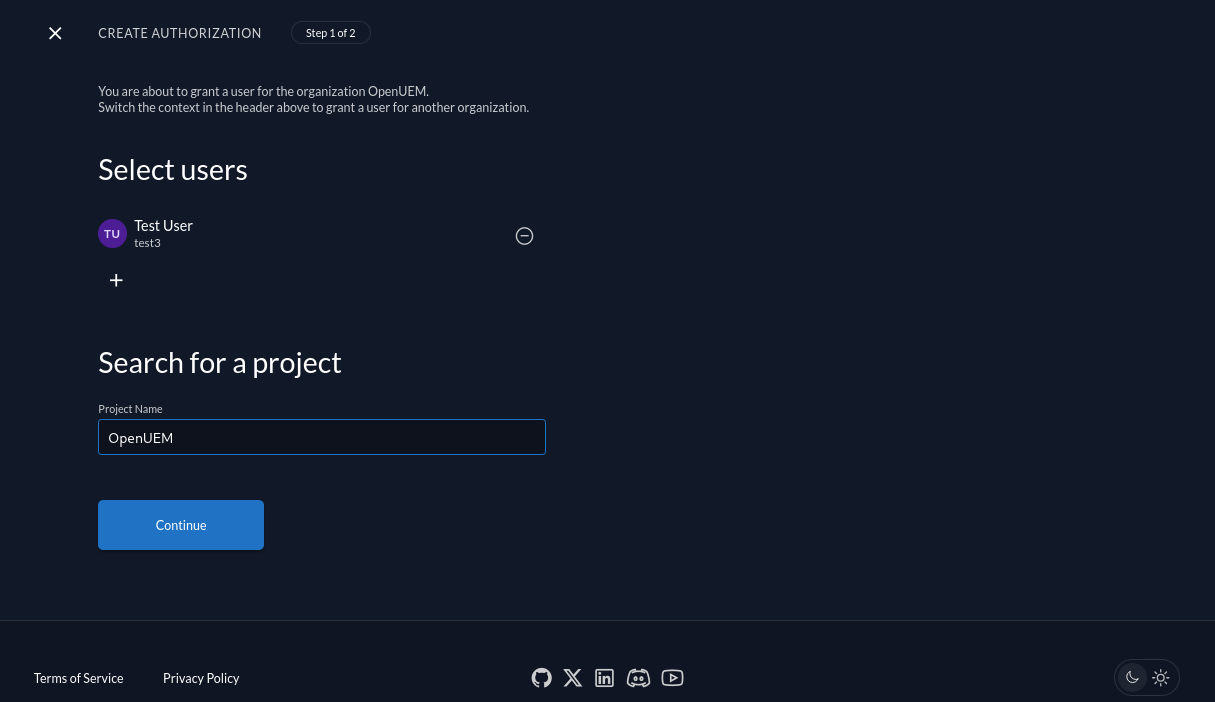
It’s time to assign the role openuem to one of my users creating a new Authorization.
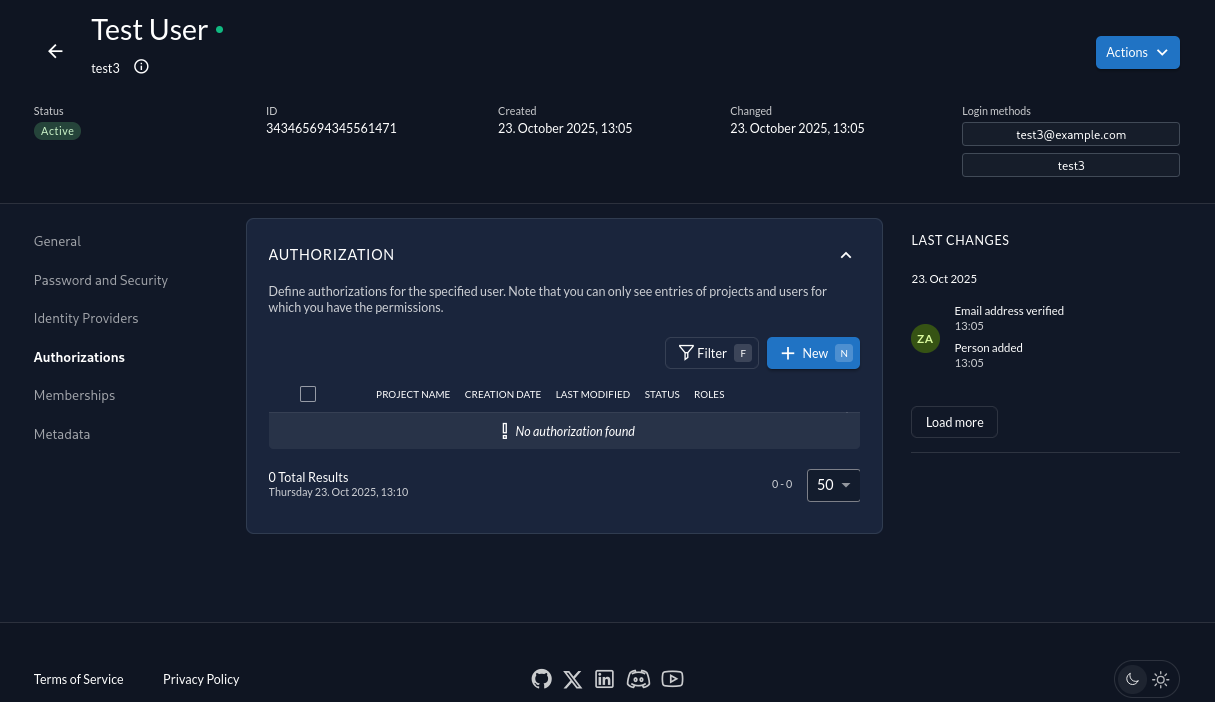
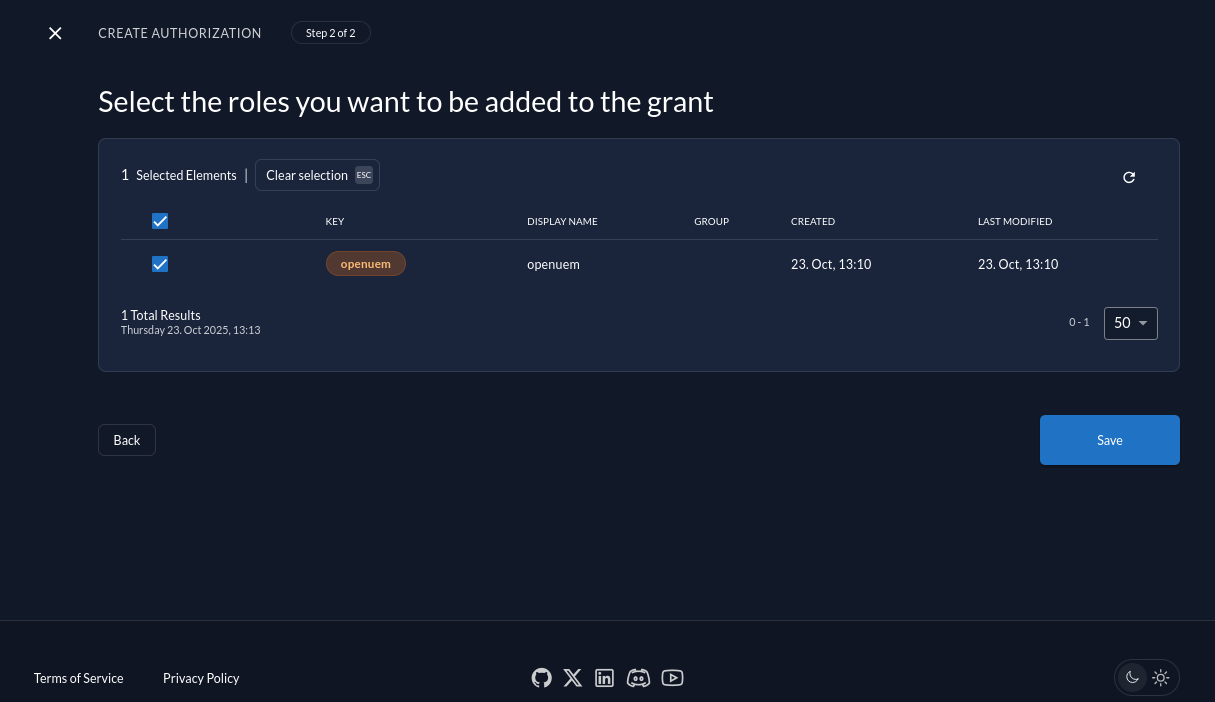
We create an authorization for our project and for the role that we’ve just created.
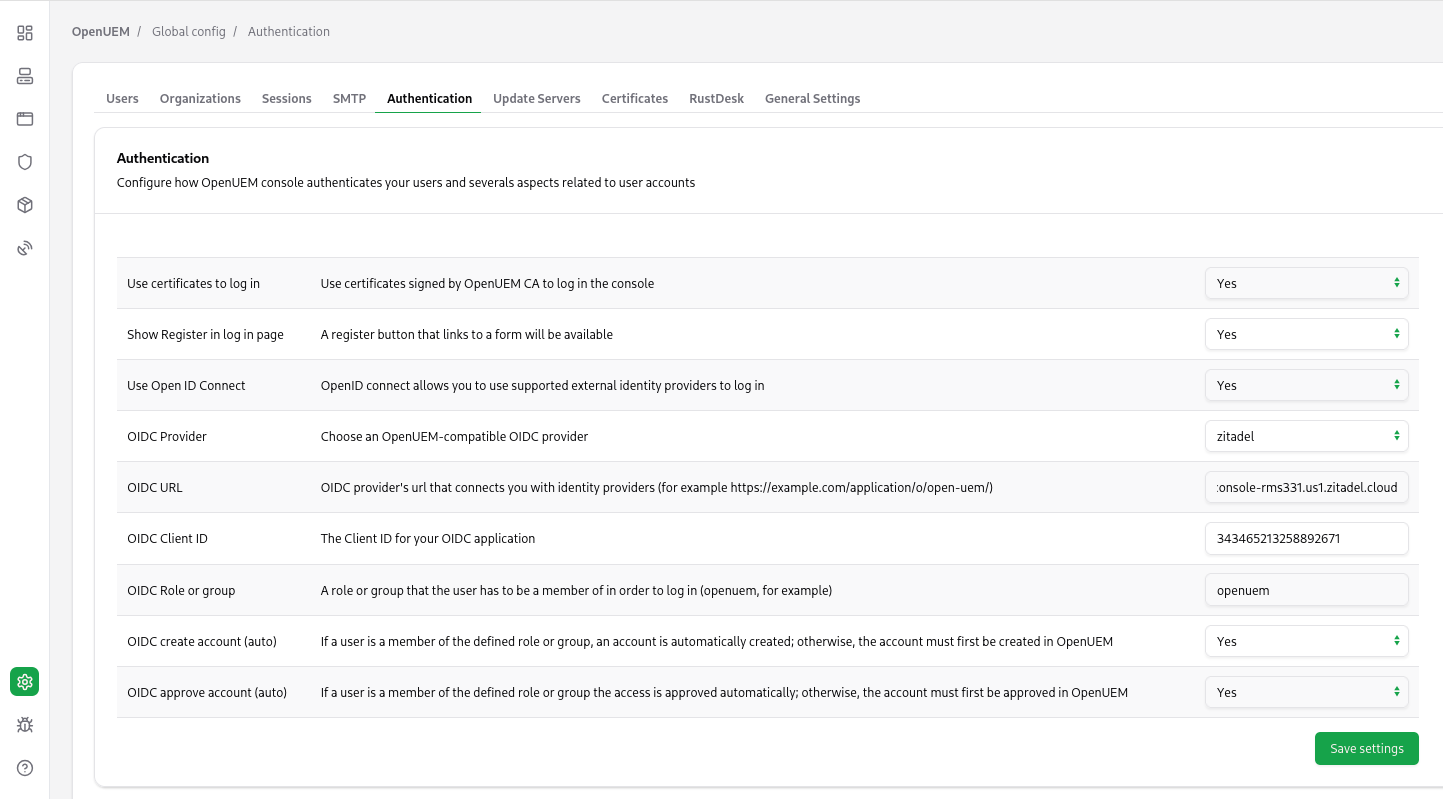
It’s time to go to OpenUEM and configure the Zitadel provider. Let’s visit the Global configuration and click the Authentication tab. Here we can manage how OpenUEM authenticates users. You must add the Client ID (that we copied earlier), the URL that OpenUEM will be used to communicate with Zitadel (which is the URL for our instance) and the name of the role that the user must be a member of (in my case openuem).
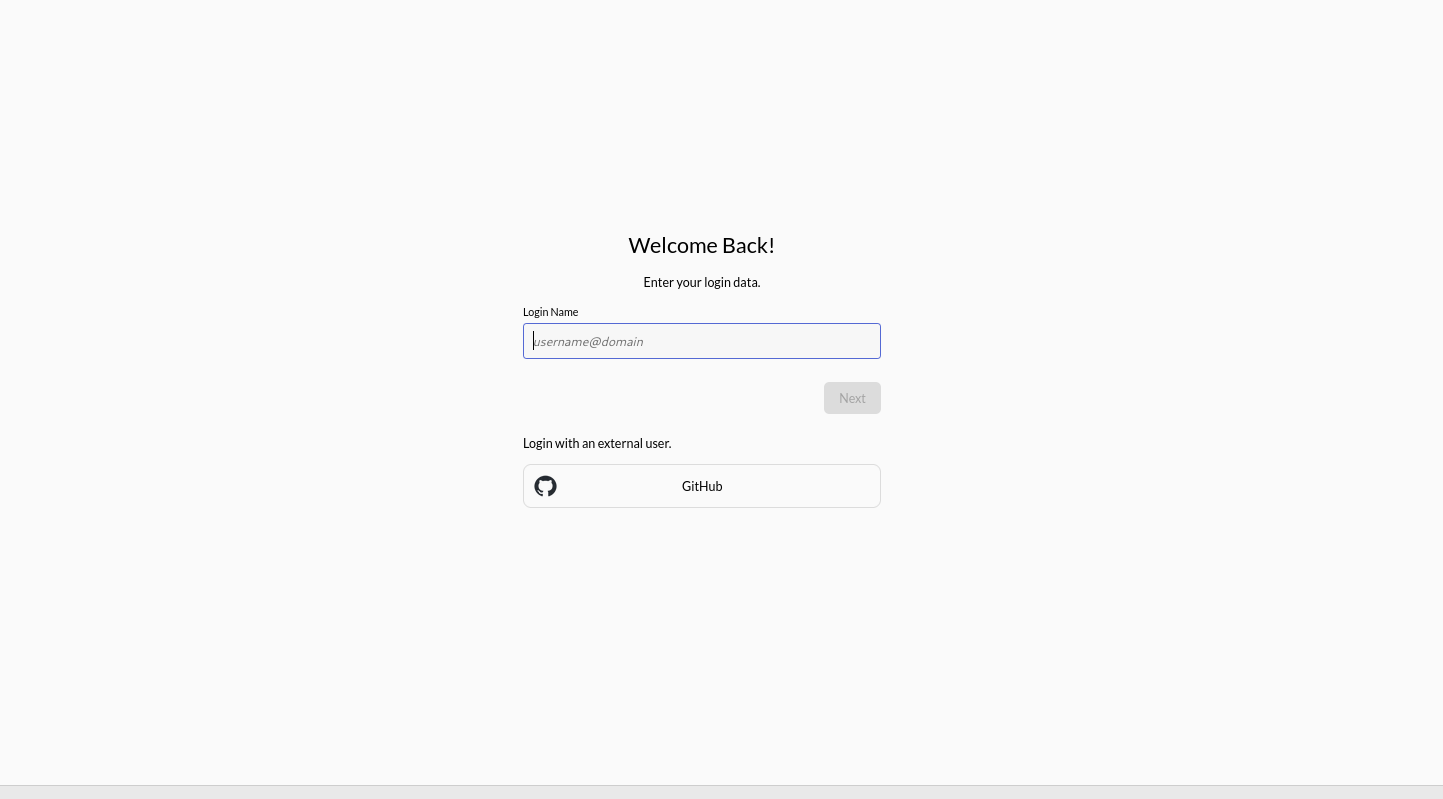
Once you save the required settings for Zitadel, when you click the Login with OpenID Connect button, you should be redirected to Zitadel's login page.
After a successful log in, you should see OpenUEM’s dashboard.