🐘 Setting the Postgres database
1. Ubuntu/Debian
First, install the database server, start the Postgres database server and enable the service to start at boot:
sudo apt install -y postgresql
sudo systemctl start postgresql
sudo systemctl enable postgresql
Then check that the server is running:

Now, install the postgresql client:
sudo apt install postgresql-client
Run the following command to open psql as the postgres user:
sudo -u postgres psql
From postgres# prompt introduce the following commands, changing the user, password and database name according to your needs:
CREATE DATABASE openuem;
CREATE USER test WITH ENCRYPTED PASSWORD 'test';
GRANT ALL PRIVILEGES ON DATABASE openuem TO test;
ALTER DATABASE openuem OWNER TO test;
\q
The OpenUEM database and the associated user should be ready.
When you install OpenUEM (server components or agent) you'll have to specify the database url. Following the previous example the database url should be postgres://test:test@localhost:5432/openuem
2. Windows
First, install the Postgres database server using the following reference:
Once you’ve installed Postgres on Windows using the default installation you must create a database for OpenUEM and add a user with privileges on that database.
In this section we’re going to use pgAdmin to manage the database with a user interface. Open pgAdmin and log in to the database with your superuser password. Now, let’s create the user.
Open pgAdmin and log in to the database with your superuser password. Now, let’s create the user from Login/Group Roles. Right click on Login/Group Roles and select Create > Login/Group Role...

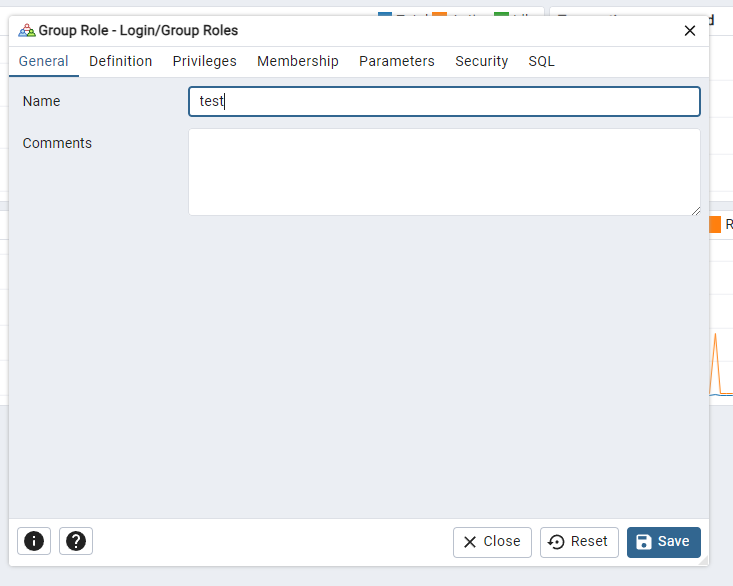
In the new windows give the account a username.
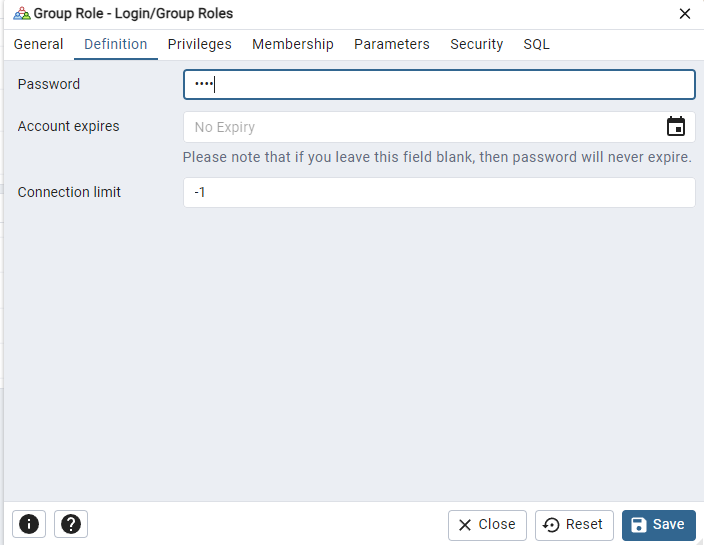
Click on the Definition tab to set a password for the account.
Click on the Privileges tab and enable that the user can login to the database.

Finally click on Save to create the account
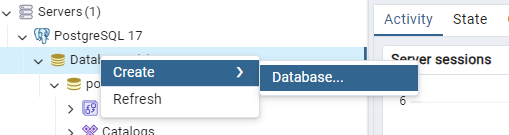
Now let’s create the database. Right click on Databases and select Create > Database…
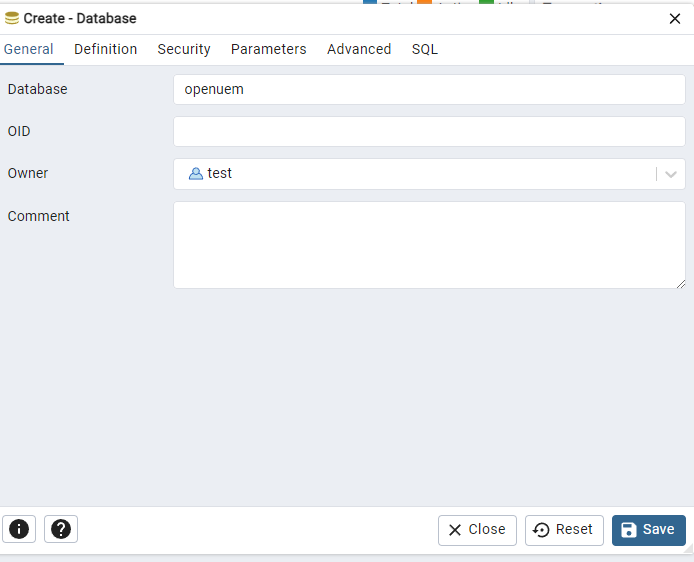
Give the database a name and assign the owner to the account that you’ve created previously.
Click on the Security tab and set all privileges to the account.
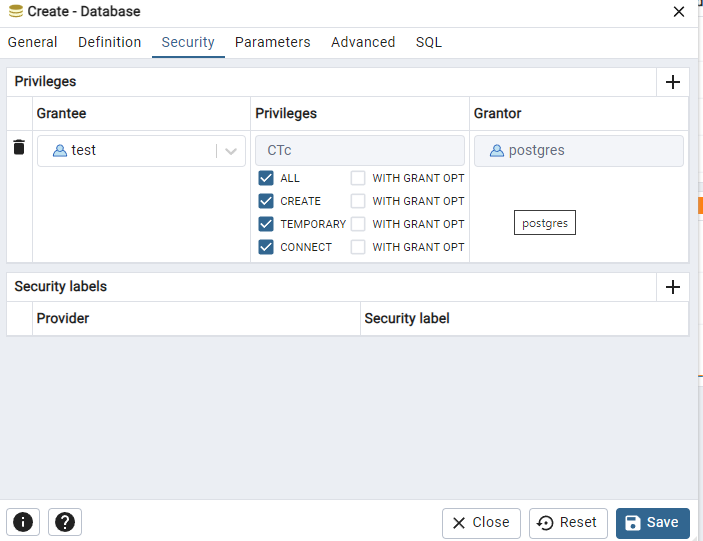
Finally, click on Save to create the database.
3. RedHat/AlmaLinux/Fedora/Rocky Linux
First, install the Postgres database server using the following references:
Now, initialize the database, start the Postgres database server and enable the service to start at boot:
sudo postgresql-17-setup --initdb
sudo systemctl start postgresql-17
sudo systemctl enable postgresql-17
Then check that the server is running:
sudo systemctl status postgresql-17
● postgresql-17.service - PostgreSQL 17 database server
     Loaded: loaded (/usr/lib/systemd/system/postgresql-17.service; enabled; preset: disabled)
     Active: active (running) since Tue 2025-07-15 13:33:00 CEST; 2min 52s ago
       Docs: https://www.postgresql.org/docs/17/static/
Now, install the postgresql client:
sudo dnf install postgresql17
Run the following command to open psql as the postgres user:
sudo -u postgres psql
From postgres# prompt introduce the following commands, changing the user, password and database name according to your needs:
CREATE DATABASE openuem;
CREATE USER test WITH ENCRYPTED PASSWORD 'test';
GRANT ALL PRIVILEGES ON DATABASE openuem TO test;
ALTER DATABASE openuem OWNER TO test;
\q
For Fedora servers, according to Fedora docs we must edit the /var/lib/pgsql/data/pg_hba.conf and replace host all all 127.0.0.1/32 ident with host all all 127.0.0.1/32 md5 and restart the service sudo systemctl restart postgresql
The OpenUEM database and the associated user should be ready.
When you install OpenUEM (server components or agent) you'll have to specify the database url. Following the previous example the database url should be postgres://test:test@localhost:5432/openuem
How to remove the database tables
If you need to perform a clean installation, you should remove the database tables. First you must open a psql session:
sudo -u postgres psql
From postgres# prompt connect to the database \c openuem, execute the drop table instructions (you can copy and paste them) and quit the connection.
\c openuem

drop table "certificates" cascade;
drop table "agents" cascade;
drop table "releases" cascade;
drop table "agent_tags" cascade;
drop table "antiviri" cascade;
drop table "apps" cascade;
drop table "computers" cascade;
drop table "deployments" cascade;
drop table "logical_disks" cascade;
drop table "metadata" cascade;
drop table "org_metadata" cascade;
drop table "monitors" cascade;
drop table "network_adapters" cascade;
drop table "operating_systems" cascade;
drop table "printers" cascade;
drop table "revocations" cascade;
drop table "settings" cascade;
drop table "tags" cascade;
drop table "users" cascade;
drop table "sessions" cascade;
drop table "shares" cascade;
drop table "system_updates" cascade;
drop table "updates" cascade;
drop table "servers" cascade;
drop table "memory_slots" cascade;
drop table "profile_issues" cascade;
drop table "tasks" cascade;
drop table "profiles" cascade;
drop table "winget_config_exclusion" cascade;

\q