🍎 MacOS Agent
OpenUEM agents are responsible for inspecting your endpoints information and offer additional services like file browsing and package deployment.
You can install an agent in a MacOS system. This agent has been tested in Ventura (Intel) and Sequoia (Intel and Apple Silicon) machines but if you find bugs or errors please open an issue in GitHub.
If you want to deploy packages, you’ll need to install HomeBrew (https://brew.sh/) first, as OpenUEM uses brew commands to manage packages.
1. Download the package
You can visit the Downloads section located either on the sidebar or on the navbar and select the MacOS option to get the download link.
Download your preferred version (arm64 for M1/M2/M3/M4 processors or amd64 for Intel processors) and note that you can check if the checksum matches using sha256sum:
sha256sum openuem-agent.pkg
2. Install the agent
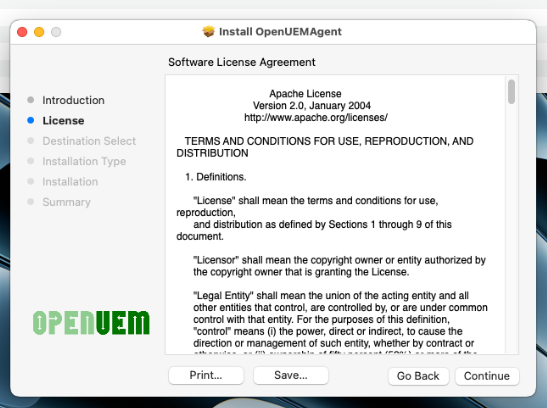
The agent can be installed by double-clicking the .pkg file and accepting the license agreement.
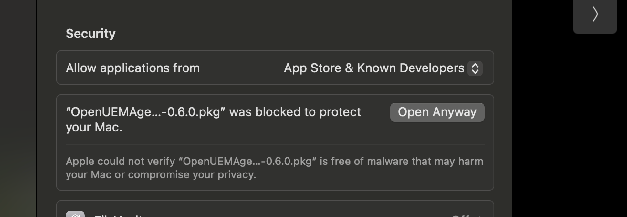
OpenUEM is in the process of getting an Apple Developer certificate that will be used to sign the agent packages, so for now the pkg files are not signed. You can install the pkg file by going to System Settings > Privacy & Security and selecting Open Anyway
The installer will show you some screens and you only have to accept the Apache-2.0 license and use the password to install the daemons used by the OpenUEM agent.
Also, the agent can be installed from the command-line using the following command:
sudo installer -pkg openuem-agent.pkg -target /
2.3. Agent post-install steps
Once the package gets installed you’ll have to create the OpenUEM agent configuration file using the example file installed with the agent.
sudo mv /Library/OpenUEMAgent/etc/openuem-agent/openuem.ini.example /Library/OpenUEMAgent/etc/openuem-agent/openuem.ini
Now you must edit the configuration file and change some values.
First, you must introduce the OpenUEM NATS server URL in the format server.your.domain:port (if you use a cluster you must introduce a comma between the servers)
[NATS]
NATSServers=terminus.openuem.eu:4433
The Agent has an SFTP server used to browse, update or delete files from the console. You must specify the port number (default: 2022). If you set an empty value the SFTP server will not be used.
SFTPPort=
The Agent will be able to use a VNC Proxy in the future but for now the VNCProxyPort variable must be present and empty
VNCProxyPort=
If you want the agent to be stored under a specific organization and site, you can add the properties TenantID and SiteID (you must use both) and assign the IDs that are listed in OpenUEM console. These settings are optional as the agent will be stored under the default organization and site if none are provided.
TenantID=1
SiteID=1
If your endpoint has a firewall, you must enable the incoming traffic to the SFTP port from OpenUEM consoleport is 1433
The agent requires some certificates to secure connections between the agent and the rest of OpenUEM components. You must place the required certificates under the /etc/openuem-agent/certificates folder with administrator privileges. You should find the certificates and private keys in the folder where the OpenUEM Server/Docker was installed.
These are the certificates required by the OpenUEM agent:
- ca.cer, this is the Certification Authority certificate file. You should place the file in
/Library/OpenUEMAgent/etc/openuem-agent/certificates/ca.cer - sftp.cer, this is the public part of the SFTP certificate that the console will use to authenticate SFTP connections. You should place the file in
/Library/OpenUEMAgent/etc/openuem-agent/certificates/sftp.cer - agent.cer, this is the certificate that allows the agent to connect with the NATS server. You should place the certificate in
/Library/OpenUEMAgent/etc/openuem-agent/certificates/agent.cer - agent.key, this is the private key that allows the agent to connect with the NATS server. You should find the file in the folder where the OpenUEM Server/Docker was installed under
/Library/OpenUEMAgent/etc/openuem-agent/certificates/agent.key
Once you've copied the required certificates and edited the openuem.ini file, you must restart the openuem-agent and openuem-agent-updater services:
sudo launchctl kickstart -k -p system/eu.openuem.openuem-agent
sudo launchctl kickstart -k -p system/eu.openuem.openuem-agent-updater
3. Next steps and troubleshooting
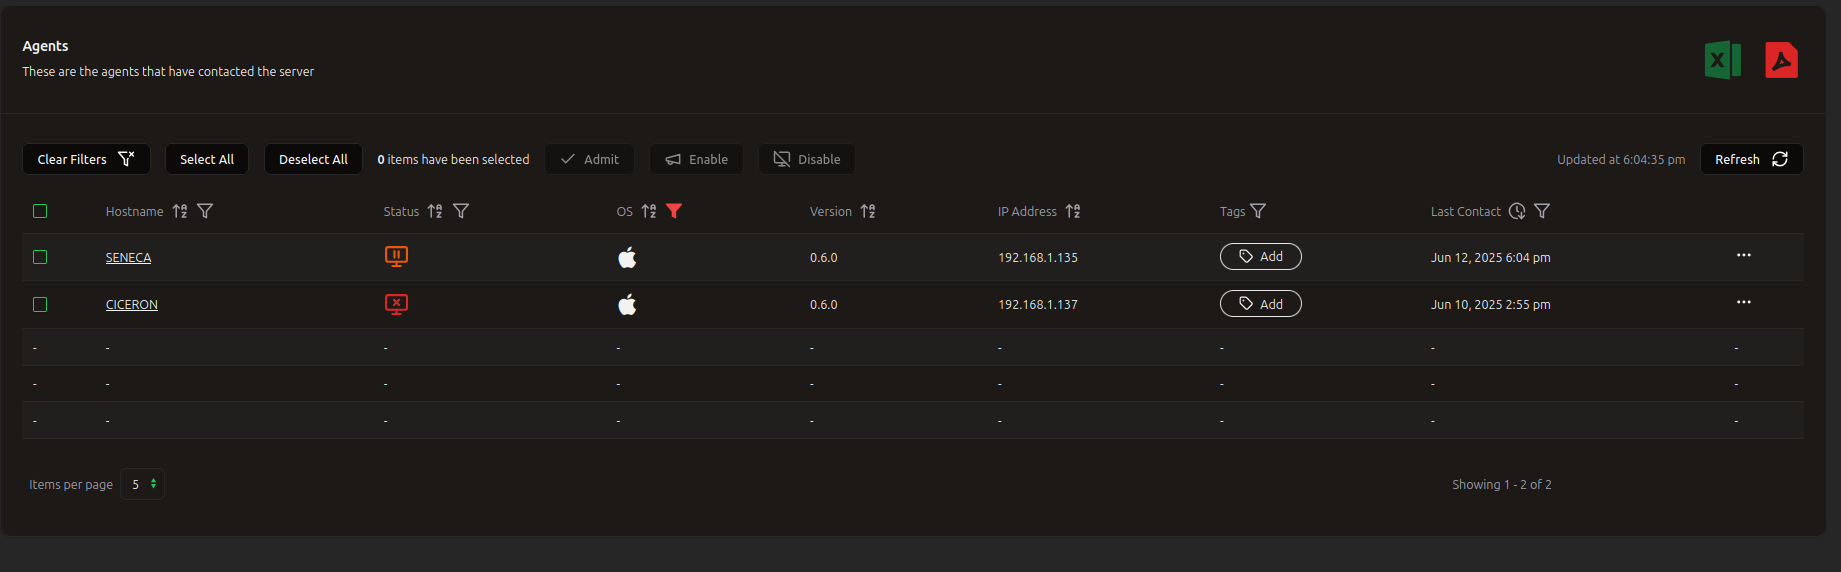
After the agent installation, if everything goes fine you should see the agent in the console's agents' view ready to be admitted
If you don't see the agent in the console something may have gone wrong. You can have a look at the agent's log located at /var/log/openuem-agent/openuem-agent.log. If the connection with the agent is possible, you can use the "Show agent's log" in the console Agents view to see the logs from the console.

In the logs you should find ERROR messages that should explain the problem:
- Maybe your NATS server or the Agent Worker (or both) is not running.
- Maybe you missed to copy a required certificates.
- Maybe you specified the wrong name for the NATS server or the port. You can edit the
/Library/OpenUEMAgent/etc/openuem-agent/openuem.inifile and change the domain name or port and restart the OpenUEM Agent service.
The agent can be deleted from OpenUEM's console. If this is the case, note that there's a task file used to uninstall the agent that is located at /Library/LaunchDaemons/openuem-agent-uninstaller.plist that you may wish to delete.
Also if you need to uninstall the agent manually you can run sudo bash /Library/OpenUEMAgent/uninstall.sh
You can install OpenUEM agent on top of a previous installation as the configuration files and certificates will remain untouched. If using the installer with GUI, MacOS will warn you that a previous installation has been found, you can confirm that you want to continue with the installation
Need more help?, Open an issue in GitHub or send a message in Discord!